Charles Proxy Tutorial: HTTP/HTTPS Interception, Mock Data, and Debugging
A practical guide to Charles Proxy on macOS — learn how to intercept HTTP/HTTPS traffic, mock API responses, throttle network speed, use breakpoints, and configure SSL certificates.
835 Words
2015-08-15 03:33 +0000
Charles is one of the most popular network debugging tools on macOS. It works as an HTTP proxy, allowing you to inspect, intercept, and modify network traffic between your device and the internet. This guide covers the most practical use cases for mobile and web developers.
1. Setting Up Proxy Capture
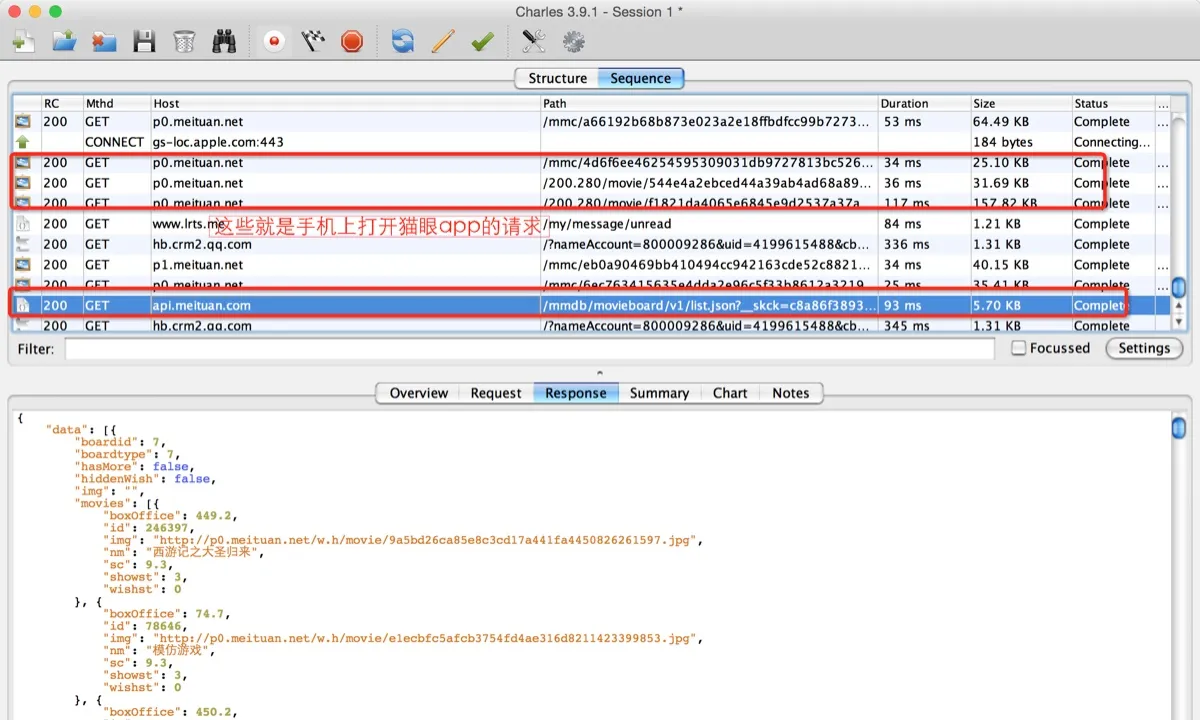
Open Charles and go to Proxy > Proxy Settings to verify the proxy port (default: 8888).

On an iPhone, go to Settings > Wi-Fi, select your current network, scroll down to HTTP Proxy, choose Manual, and enter your Mac’s local IP address along with the Charles proxy port.
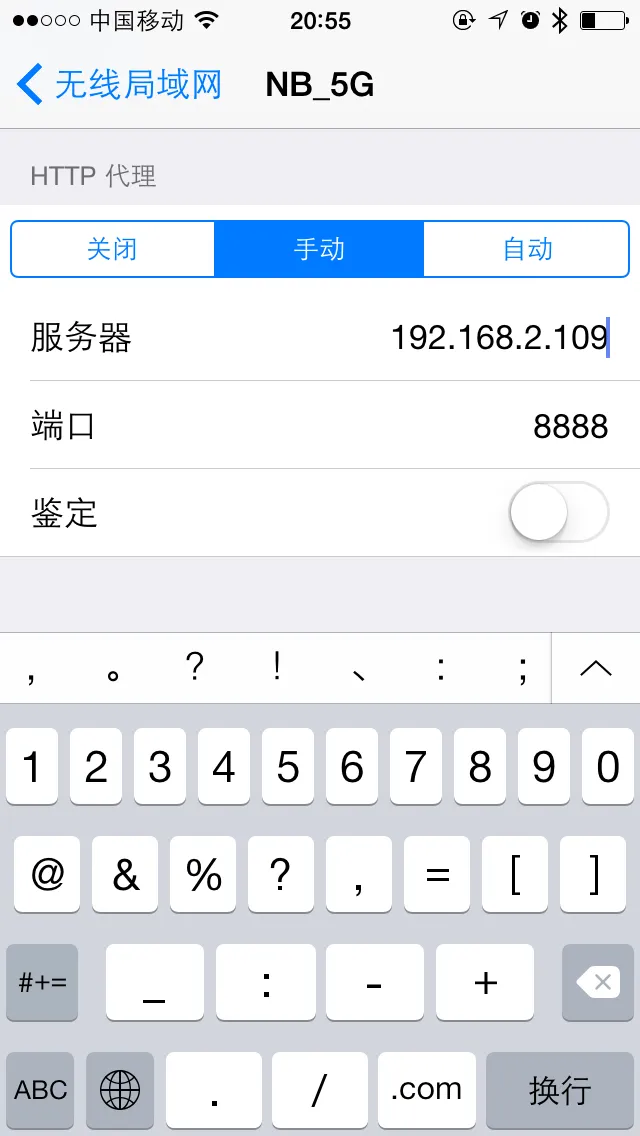
You can find your Mac’s local IP under System Settings > Network. Once configured, open any app on your phone. Charles will prompt you to allow the connection — click Allow. You should start seeing traffic appear in Charles:
2. Simulating Slow Network Conditions
Testing under poor network conditions is essential before releasing an app. Charles has a built-in throttling feature. Go to Proxy > Throttle Settings and configure your desired speed profile.
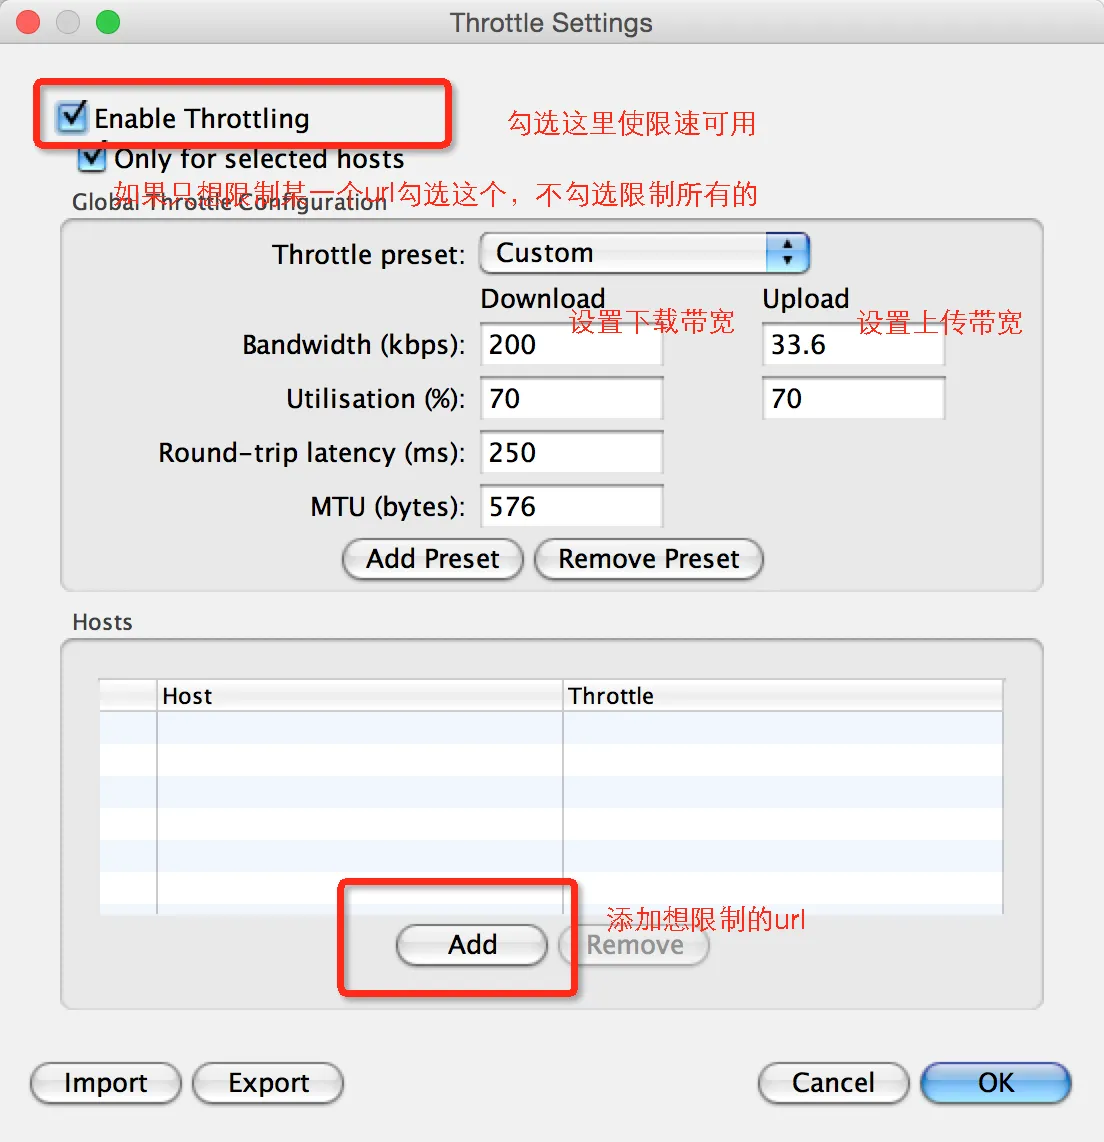
You can also restrict throttling to specific hosts by adding URLs in the Hosts section.
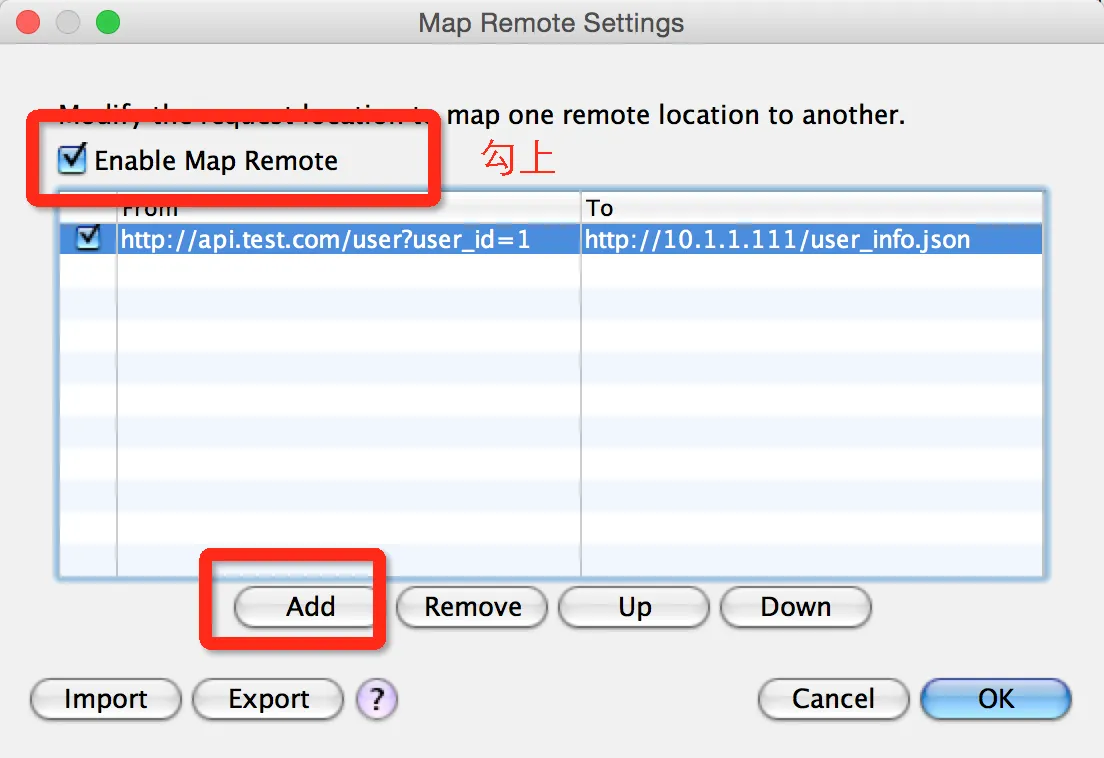
3. Redirecting Requests to a Different Server (Map Remote)
Sometimes you need to redirect an API call to a different endpoint — for example, pointing http://api.test.com/user?user_id=1 to a local development server like http://10.1.1.111/user_info.json. This requires running a local web server (Nginx or Apache).
Go to Tools > Map Remote and configure the mapping:
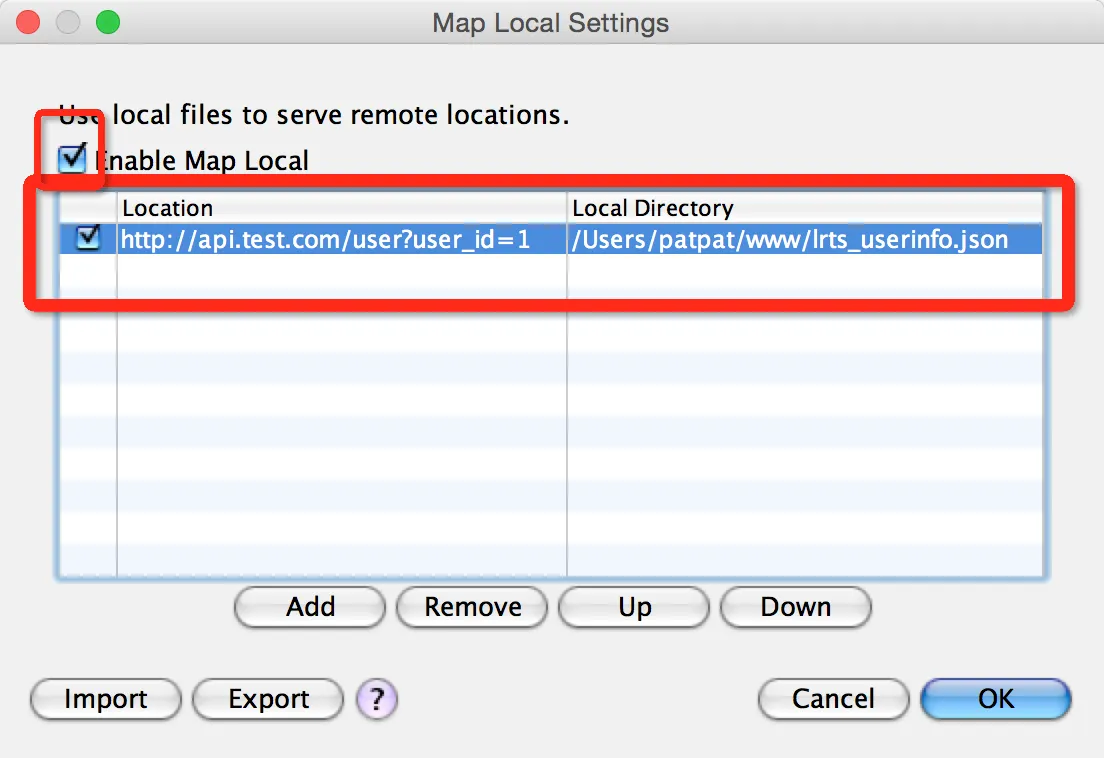
4. Returning Local File Content (Map Local)
If you don’t want to set up a local server, Map Local lets you map any request directly to a file on your machine. This is ideal for mocking API responses during development while the backend is still in progress.
Go to Tools > Map Local and set up the mapping:
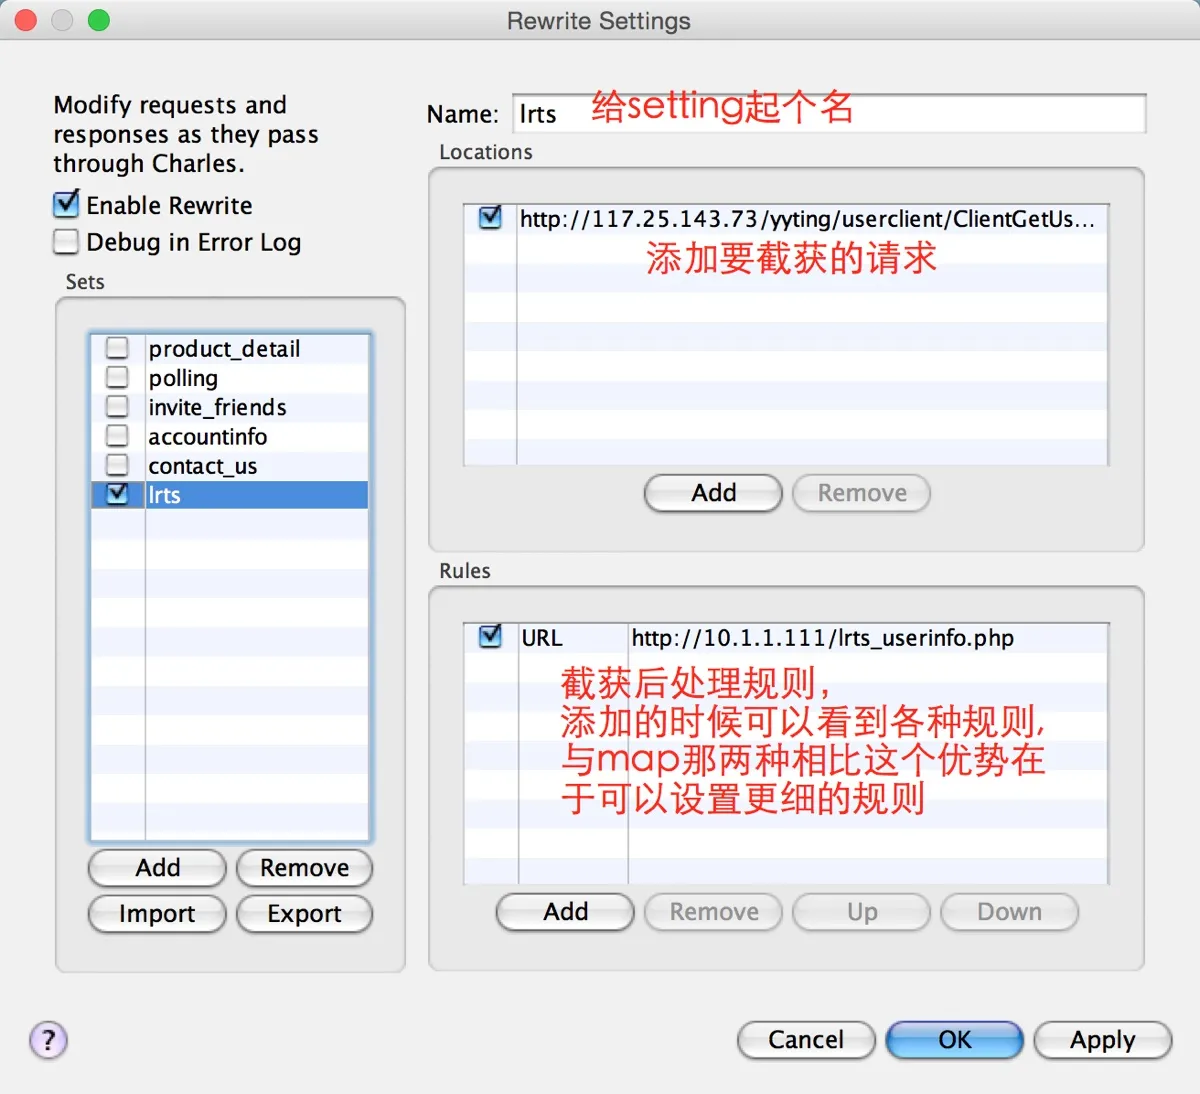
5. Modifying Requests with Rewrite Rules
When you need to selectively modify request or response data rather than replacing the entire response, use the Rewrite tool.
Go to Tools > Rewrite and configure your rules:
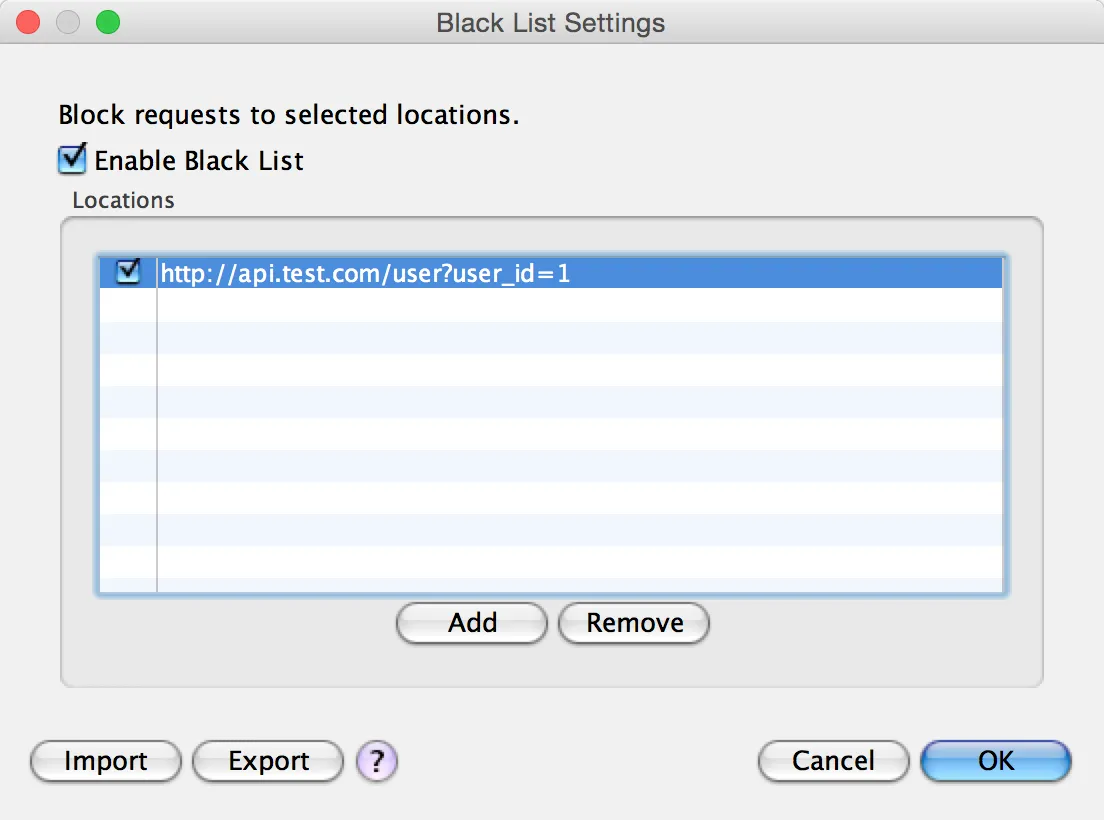
6. Blocking Requests with the Blacklist
If you want to prevent certain requests from going through (returning a 403 or 404 instead), use the blacklist feature.
Go to Tools > Black List:
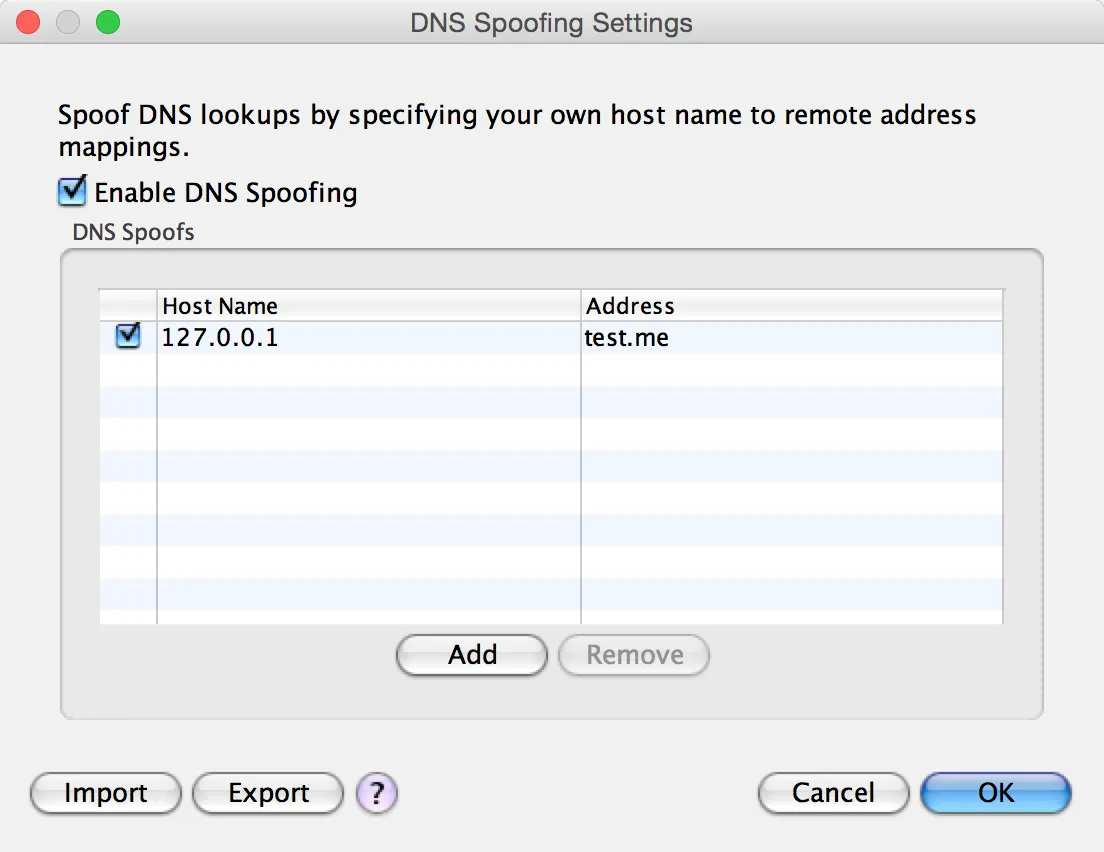
7. DNS Spoofing
DNS Spoofing resolves a domain name to a different IP address. This is useful when you want to point a production domain to a local development server.
Go to Tools > DNS Spoofing:
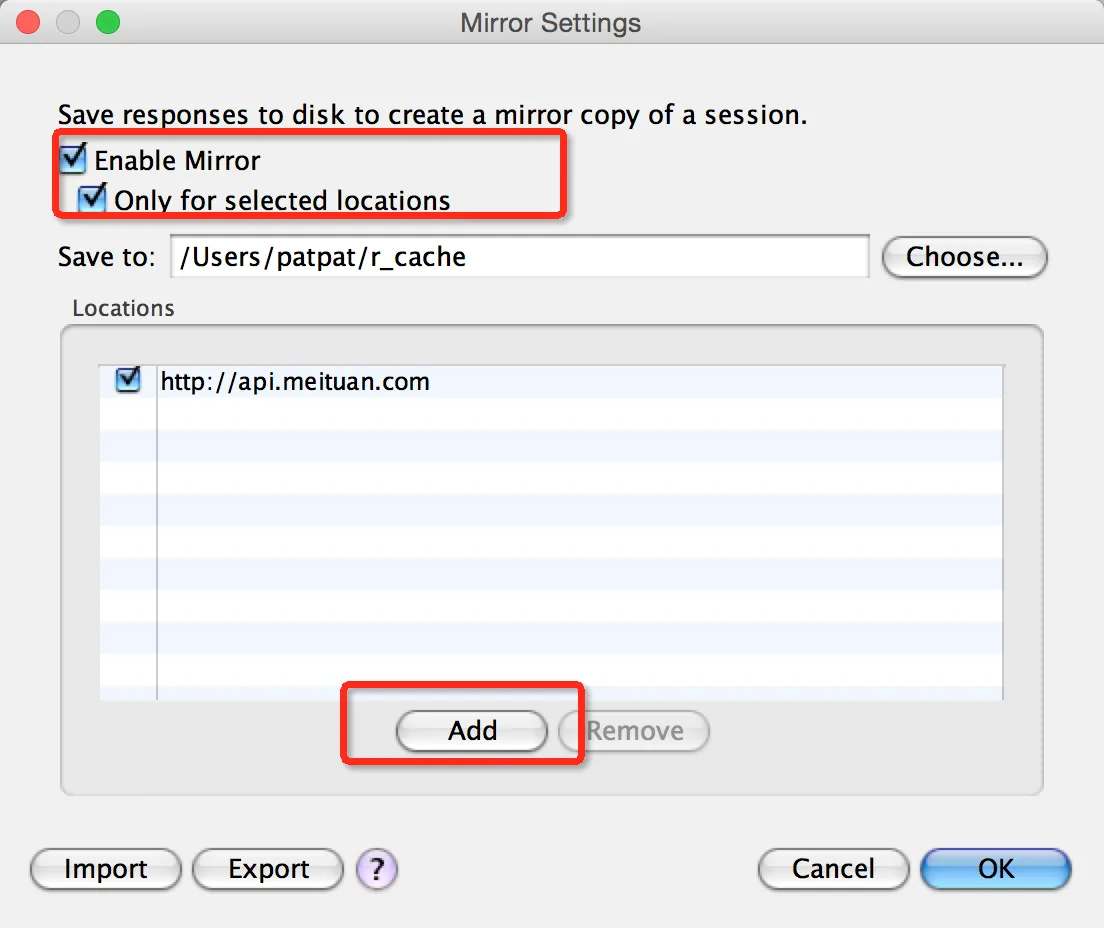
8. Caching Responses with Mirror
The Mirror feature saves copies of all response data to your local disk. This is useful for offline development or building a cache of real API responses.
Go to Tools > Mirror:
These features cover the vast majority of day-to-day API debugging scenarios. They are powerful tools, but understanding the fundamentals of HTTP and web architecture will help you get even more out of them.
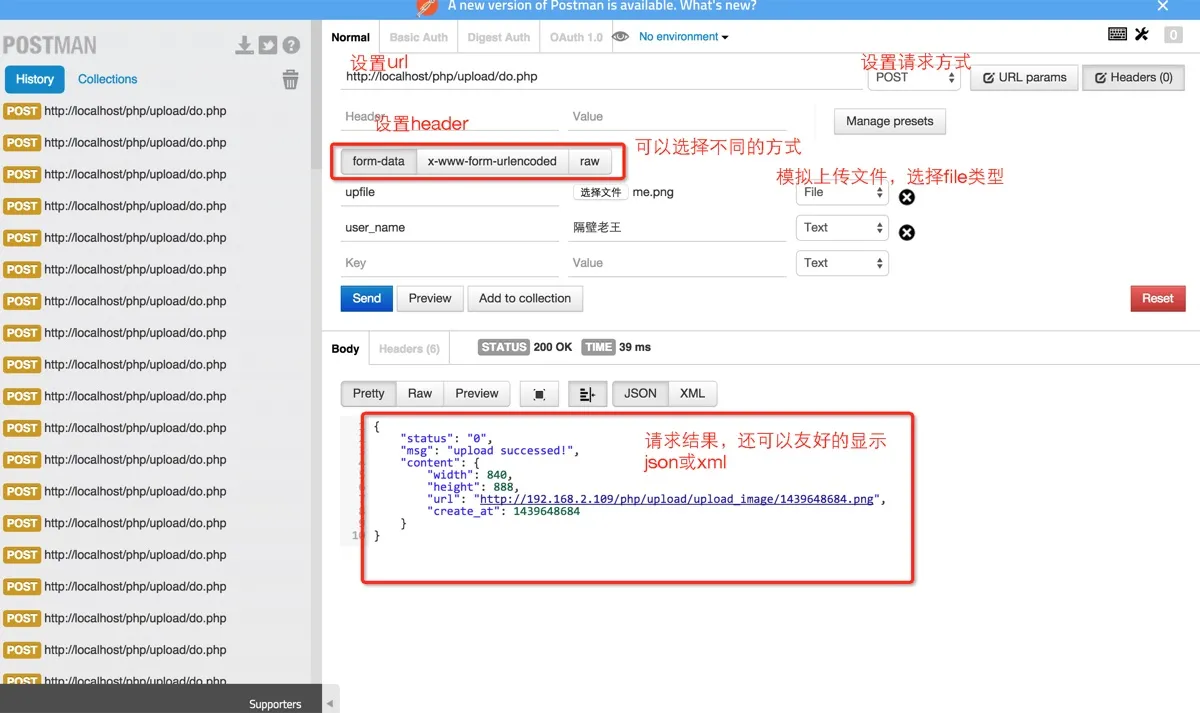
For testing API endpoints manually, consider using Postman (available as a standalone app or Chrome extension), which supports GET, POST, PUT, DELETE, file uploads, and more:
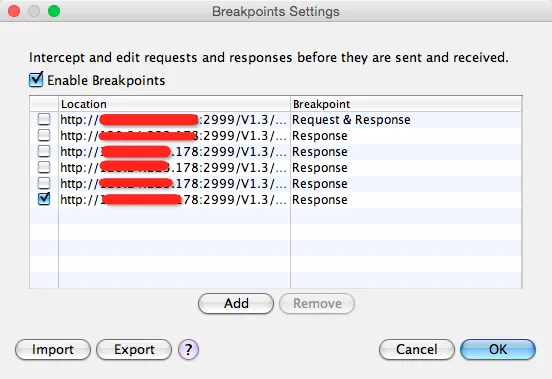
9. Breakpoint Debugging
Charles supports breakpoints on specific URLs, similar to breakpoints in an IDE. When a matching request is made, Charles pauses execution and lets you inspect and modify both the request and response before continuing.
Setting a breakpoint:
Open the breakpoint settings window:
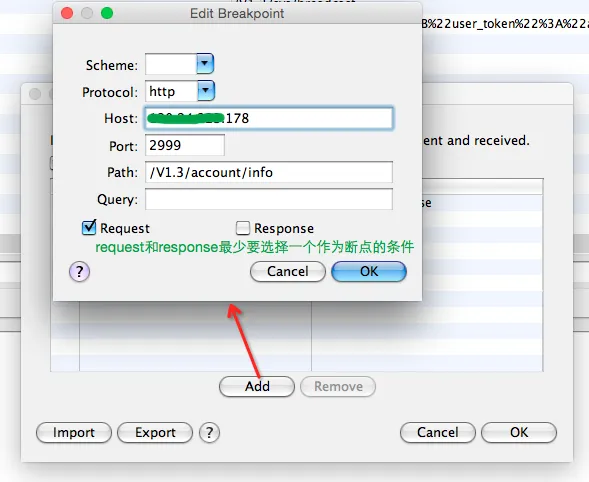
Click Add and enter the URL you want to debug:
Using the breakpoint:
When a matching request is intercepted, the breakpoint editing window appears:
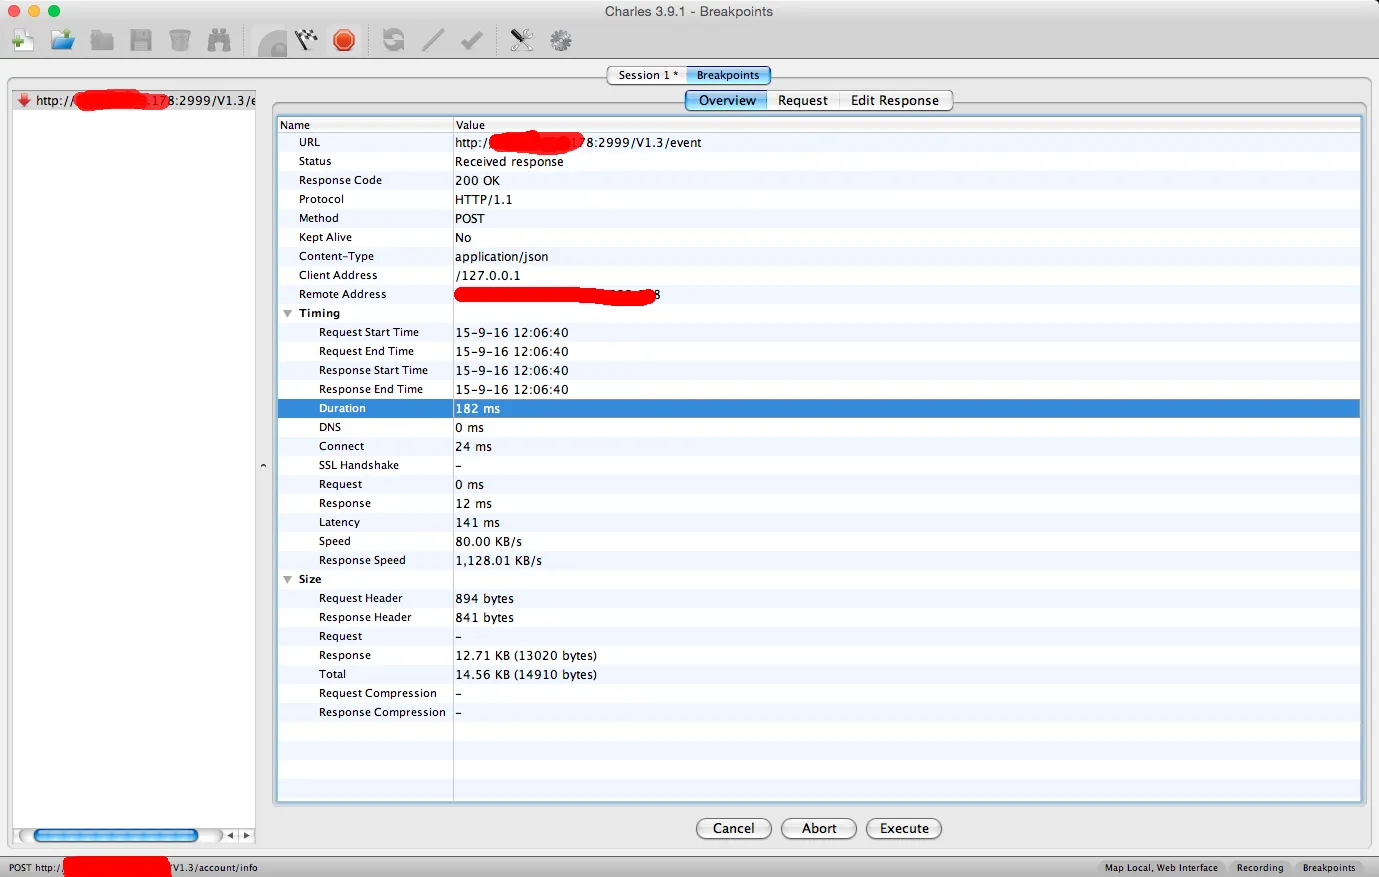
You can edit both the request and the response. In this example, only the response breakpoint is enabled:
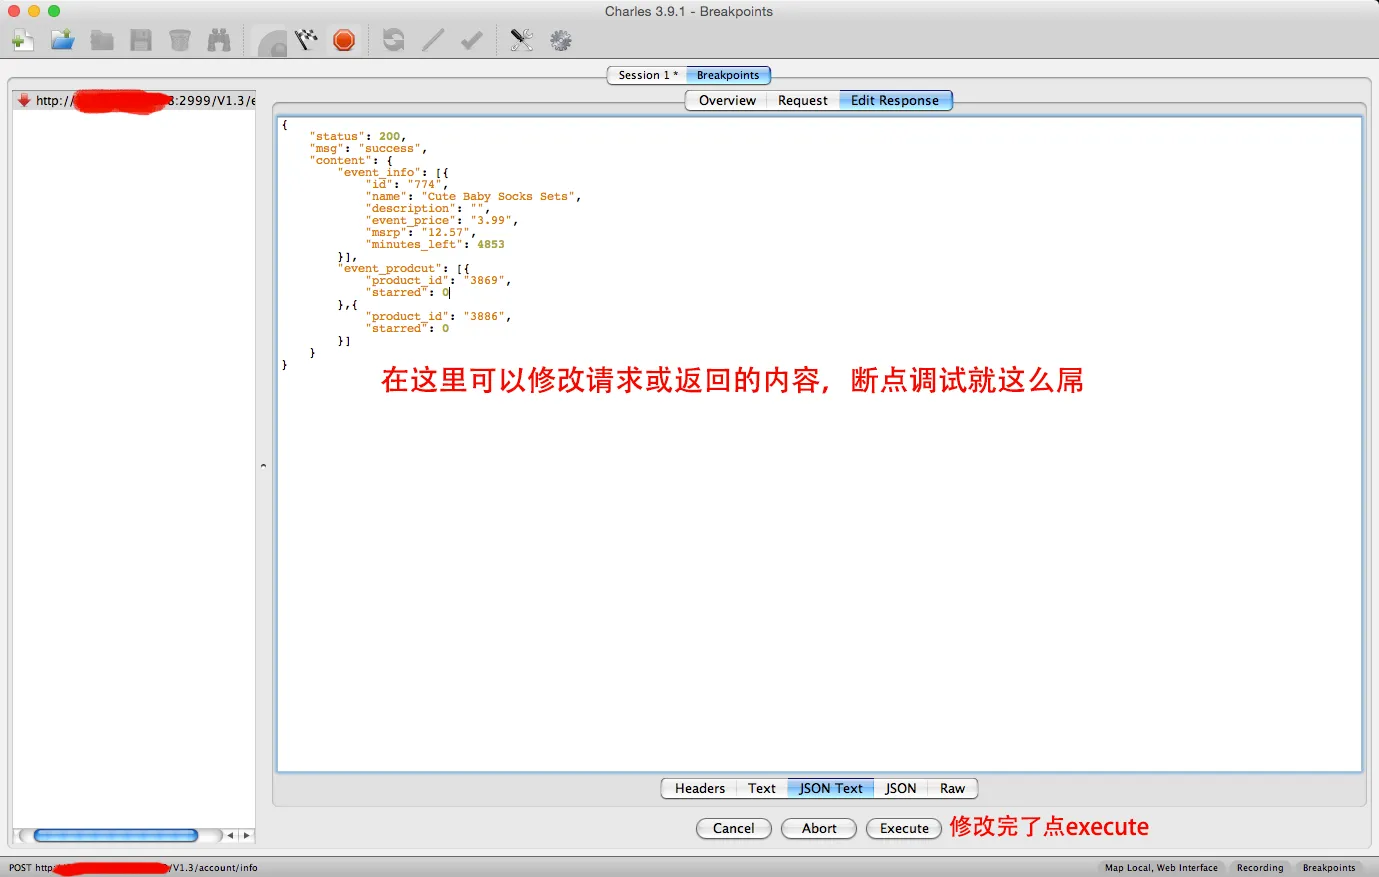
Click Execute when you’re done editing.
10. HTTPS Certificate Setup (2026 Update)
Modern macOS and iOS versions have strict security policies that require extra steps for HTTPS interception:
- macOS: After installing the Charles Root Certificate, open Keychain Access and set it to Always Trust.
- iOS: After installing the certificate profile, go to Settings > General > About > Certificate Trust Settings and manually enable full trust.
- SSL Pinning: If an app uses certificate pinning, Charles alone cannot decrypt its HTTPS traffic. You’ll need a debug build with pinning disabled or a specialized bypass tool.
11. Common Troubleshooting
Phone connected to proxy but no traffic in Charles
- Confirm both devices are on the same local network
- Check if Charles prompted to allow the device (and you approved it)
- Verify your firewall isn’t blocking the Charles port (default 8888)
HTTPS requests only show CONNECT, no content visible
- The Charles root certificate isn’t installed or isn’t trusted by the system
- The target app uses SSL pinning
Rewrite / Map Local rules not working
- Host or path matching is too strict — try broadening the pattern first
- The rule is configured but not enabled (checkbox not ticked)
Too many timeouts after enabling throttling
- Throttle parameters are set too low — start with 3G simulation before going lower
- Per-host throttling is more controllable than global throttling
Comments
Join the discussion — requires a GitHub account