Setting Up Jira and Confluence on Ubuntu: Installation, Configuration, and Data Migration
Complete guide to installing Jira and Confluence on Ubuntu 16.04 with MySQL, including database setup, license activation, user directory integration, backup/restore procedures, and security vulnerability fixes.
JiraConfluenceAtlassianLinuxMySQL
1037 Words
2019-04-15
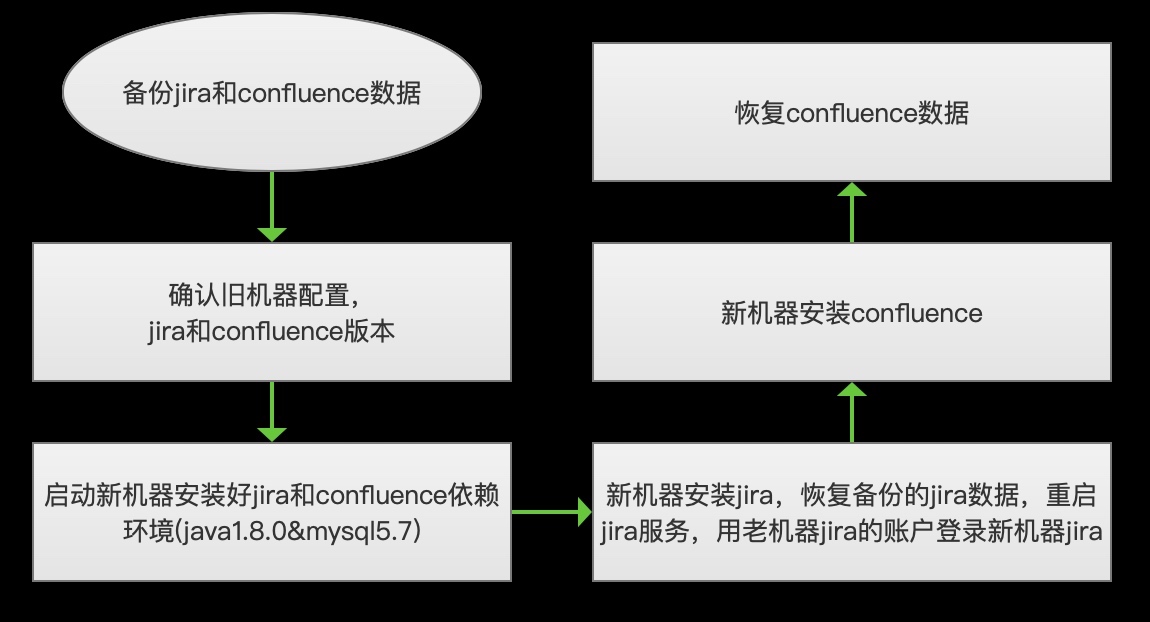
Jira and Confluence are both products from Atlassian. Jira handles project tracking, agile development management, bug tracking, and workflow management. Confluence serves as an enterprise wiki and knowledge base for team collaboration and documentation. This guide covers installing both on Ubuntu, integrating their user directories, and migrating data from an existing deployment.
Prerequisites
This migration was prompted by a cryptomining malware incident that compromised the original server. The plan was to split Jira and Confluence onto a dedicated machine. Since both share the Jira user directory, the installation order matters.
Server Specs
- OS: Ubuntu 16.04.5 LTS
- CPU: 4 cores
- Memory: 16 GB
This configuration supports up to approximately 2,000 users.
Java
Install JDK 1.8 or later:
sudo apt install default-jre

java -version
# openjdk version "1.8.0_191"
MySQL
Install MySQL 5.7:
sudo apt-get install mysql-server
Follow the prompts to set the root password.
Jira Installation
Download the Installer
# Download Jira (match your existing version)
wget https://downloads.atlassian.com/software/jira/downloads/atlassian-jira-software-7.3.8-x64.bin
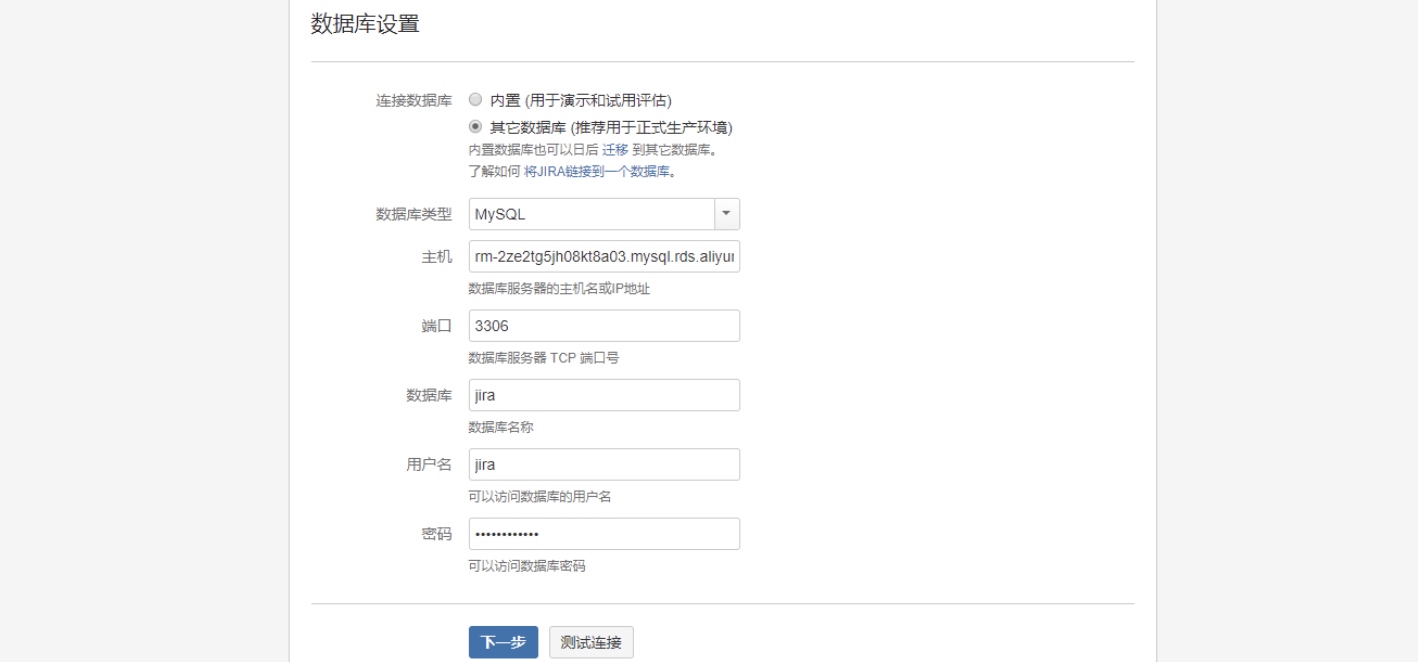
Create the Jira Database
Log in to MySQL and run:
CREATE DATABASE jira CHARACTER SET utf8 COLLATE utf8_bin;
GRANT ALL ON jira.* TO 'jira'@'localhost' IDENTIFIED BY 'jirapassword';
FLUSH PRIVILEGES;
Important: The collation must be
utf8_bin— Jira requires binary collation.
Run the Installer
chmod +x atlassian-jira-software-7.3.8-x64.bin
./atlassian-jira-software-7.3.8-x64.bin
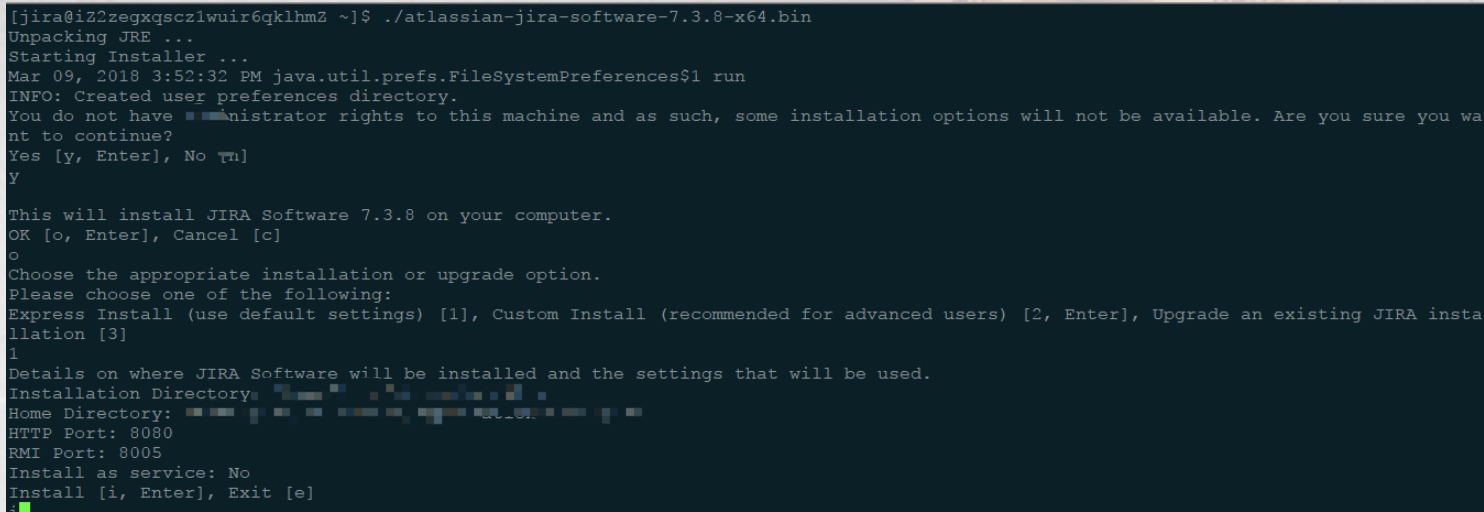
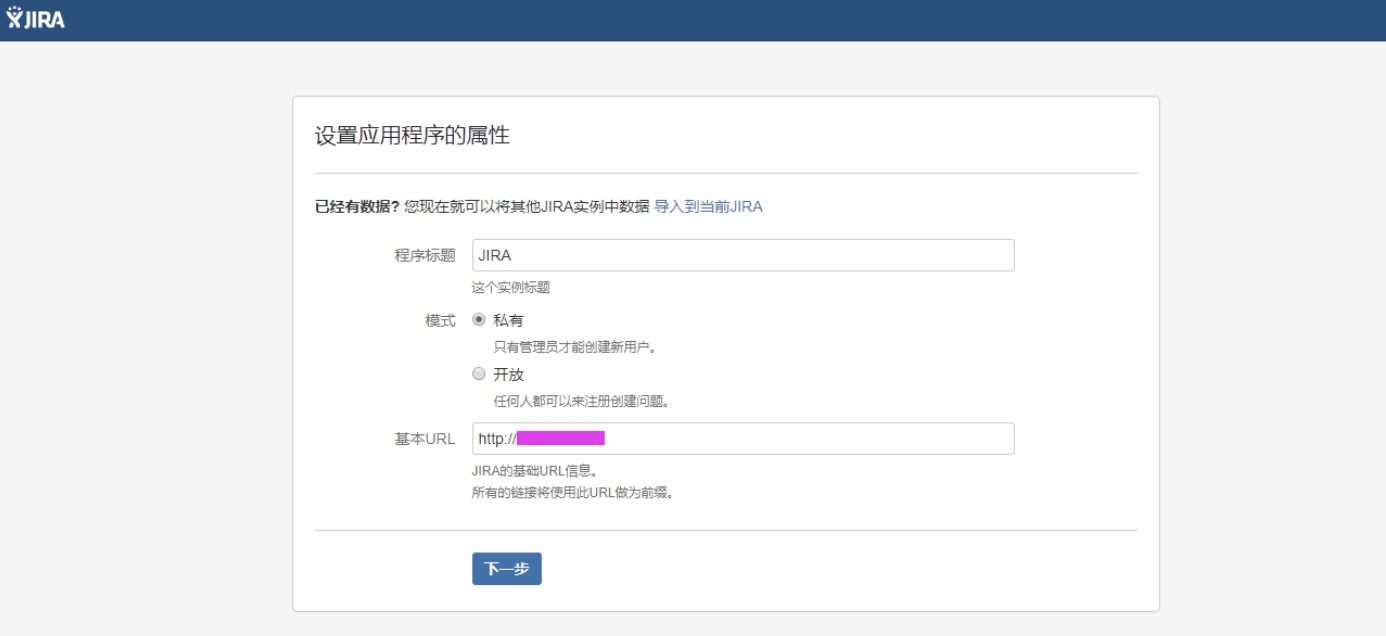
Follow the prompts. The default installation paths are:
- Application:
/opt/atlassian/jira - Data:
/var/atlassian/application-data/jira
To change the default port, edit /opt/atlassian/jira/conf/server.xml.
License Activation
- Stop Jira:
sudo /etc/init.d/jira stop - Copy the MySQL connector JAR to
/opt/atlassian/jira/atlassian-jira/WEB-INF/lib/ - Start Jira:
sudo /etc/init.d/jira start - Open the setup wizard in your browser and follow the configuration steps:
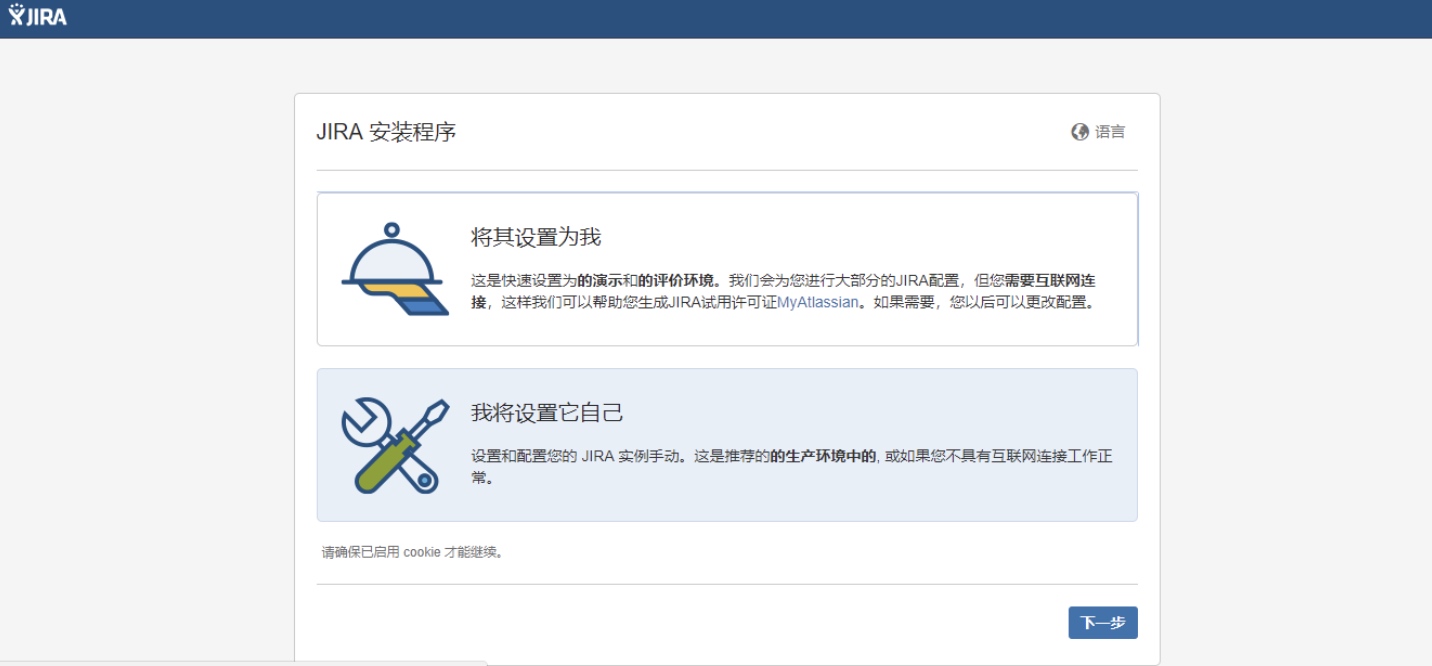
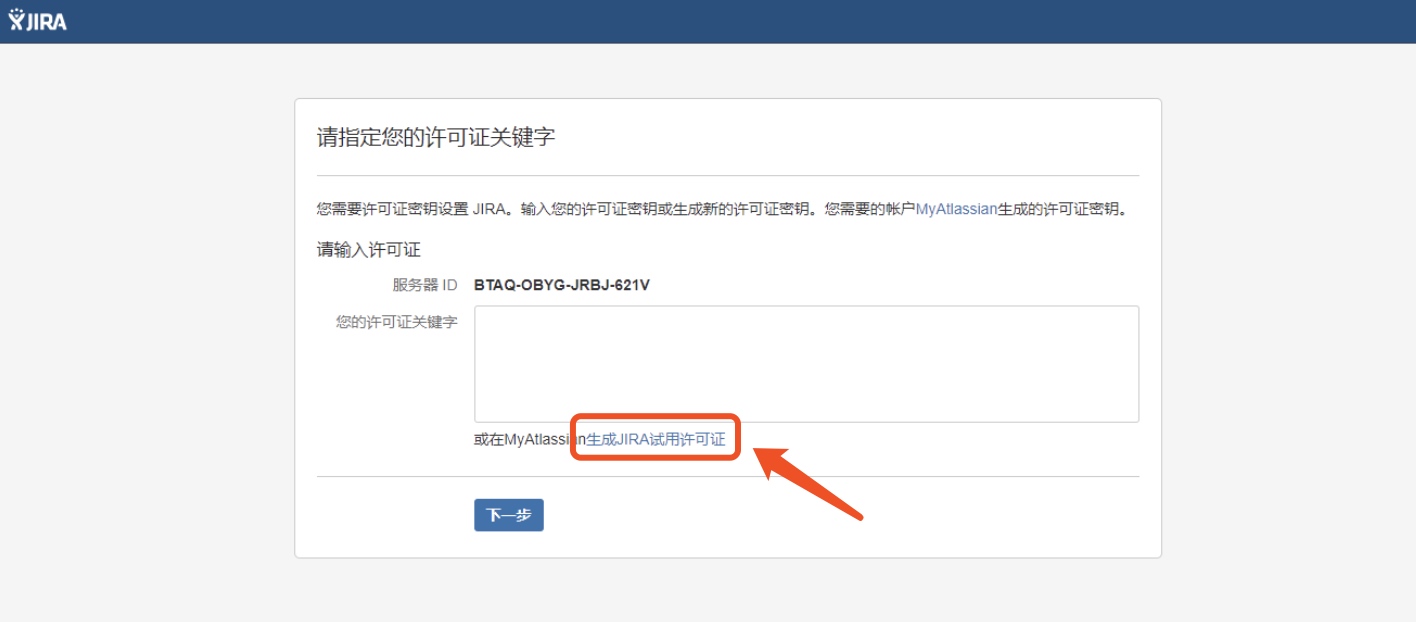
Get your license from the Atlassian website:
Complete the remaining steps (email configuration, language selection) to finish the setup.
Data Migration
On the source server:
- Log in as admin and navigate to System > Import and Export > Backup System.
- Jira creates automatic backups at
/var/atlassian/application-data/jira/export. You can also create a manual backup.
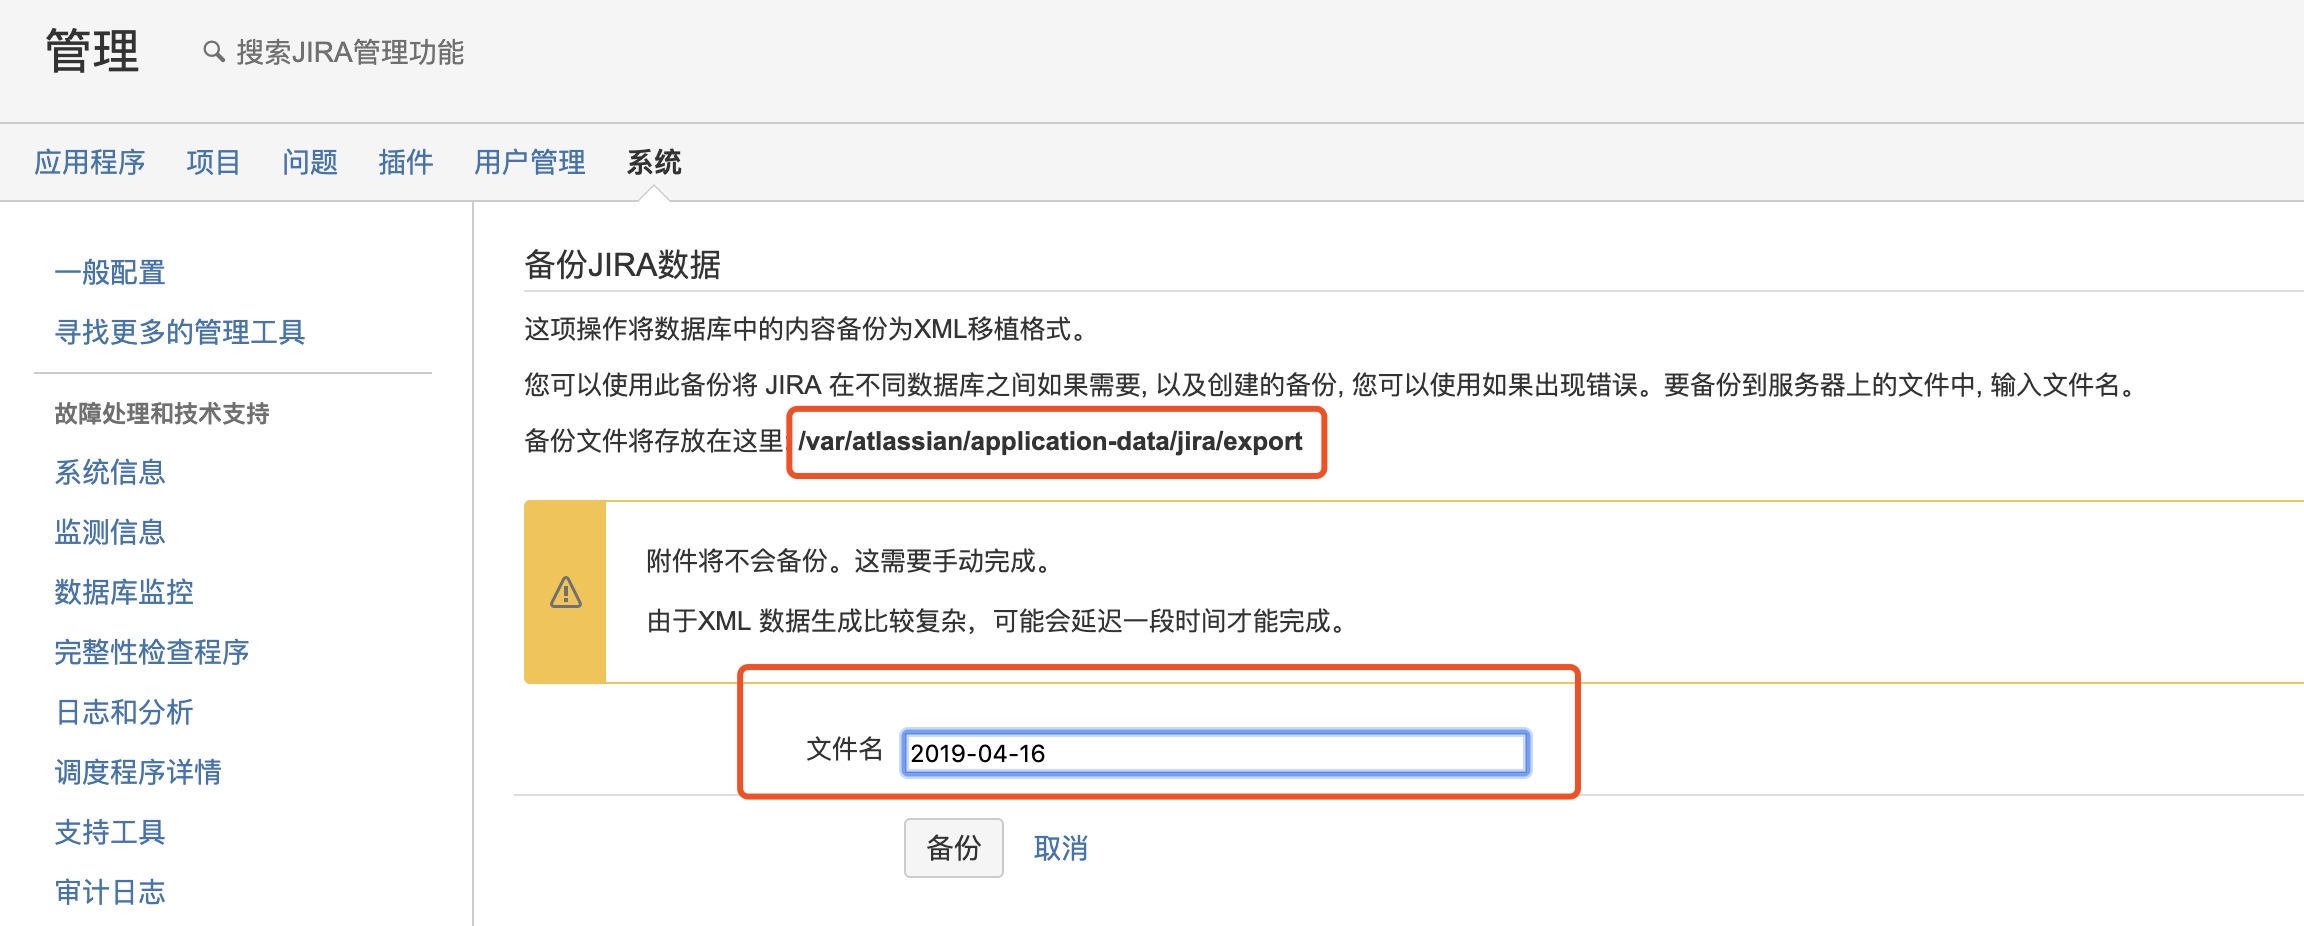
Note: The backup does not include attachments. Attachments are stored at
/var/atlassian/application-data/jira/data/attachmentsand must be backed up separately.
- Copy both
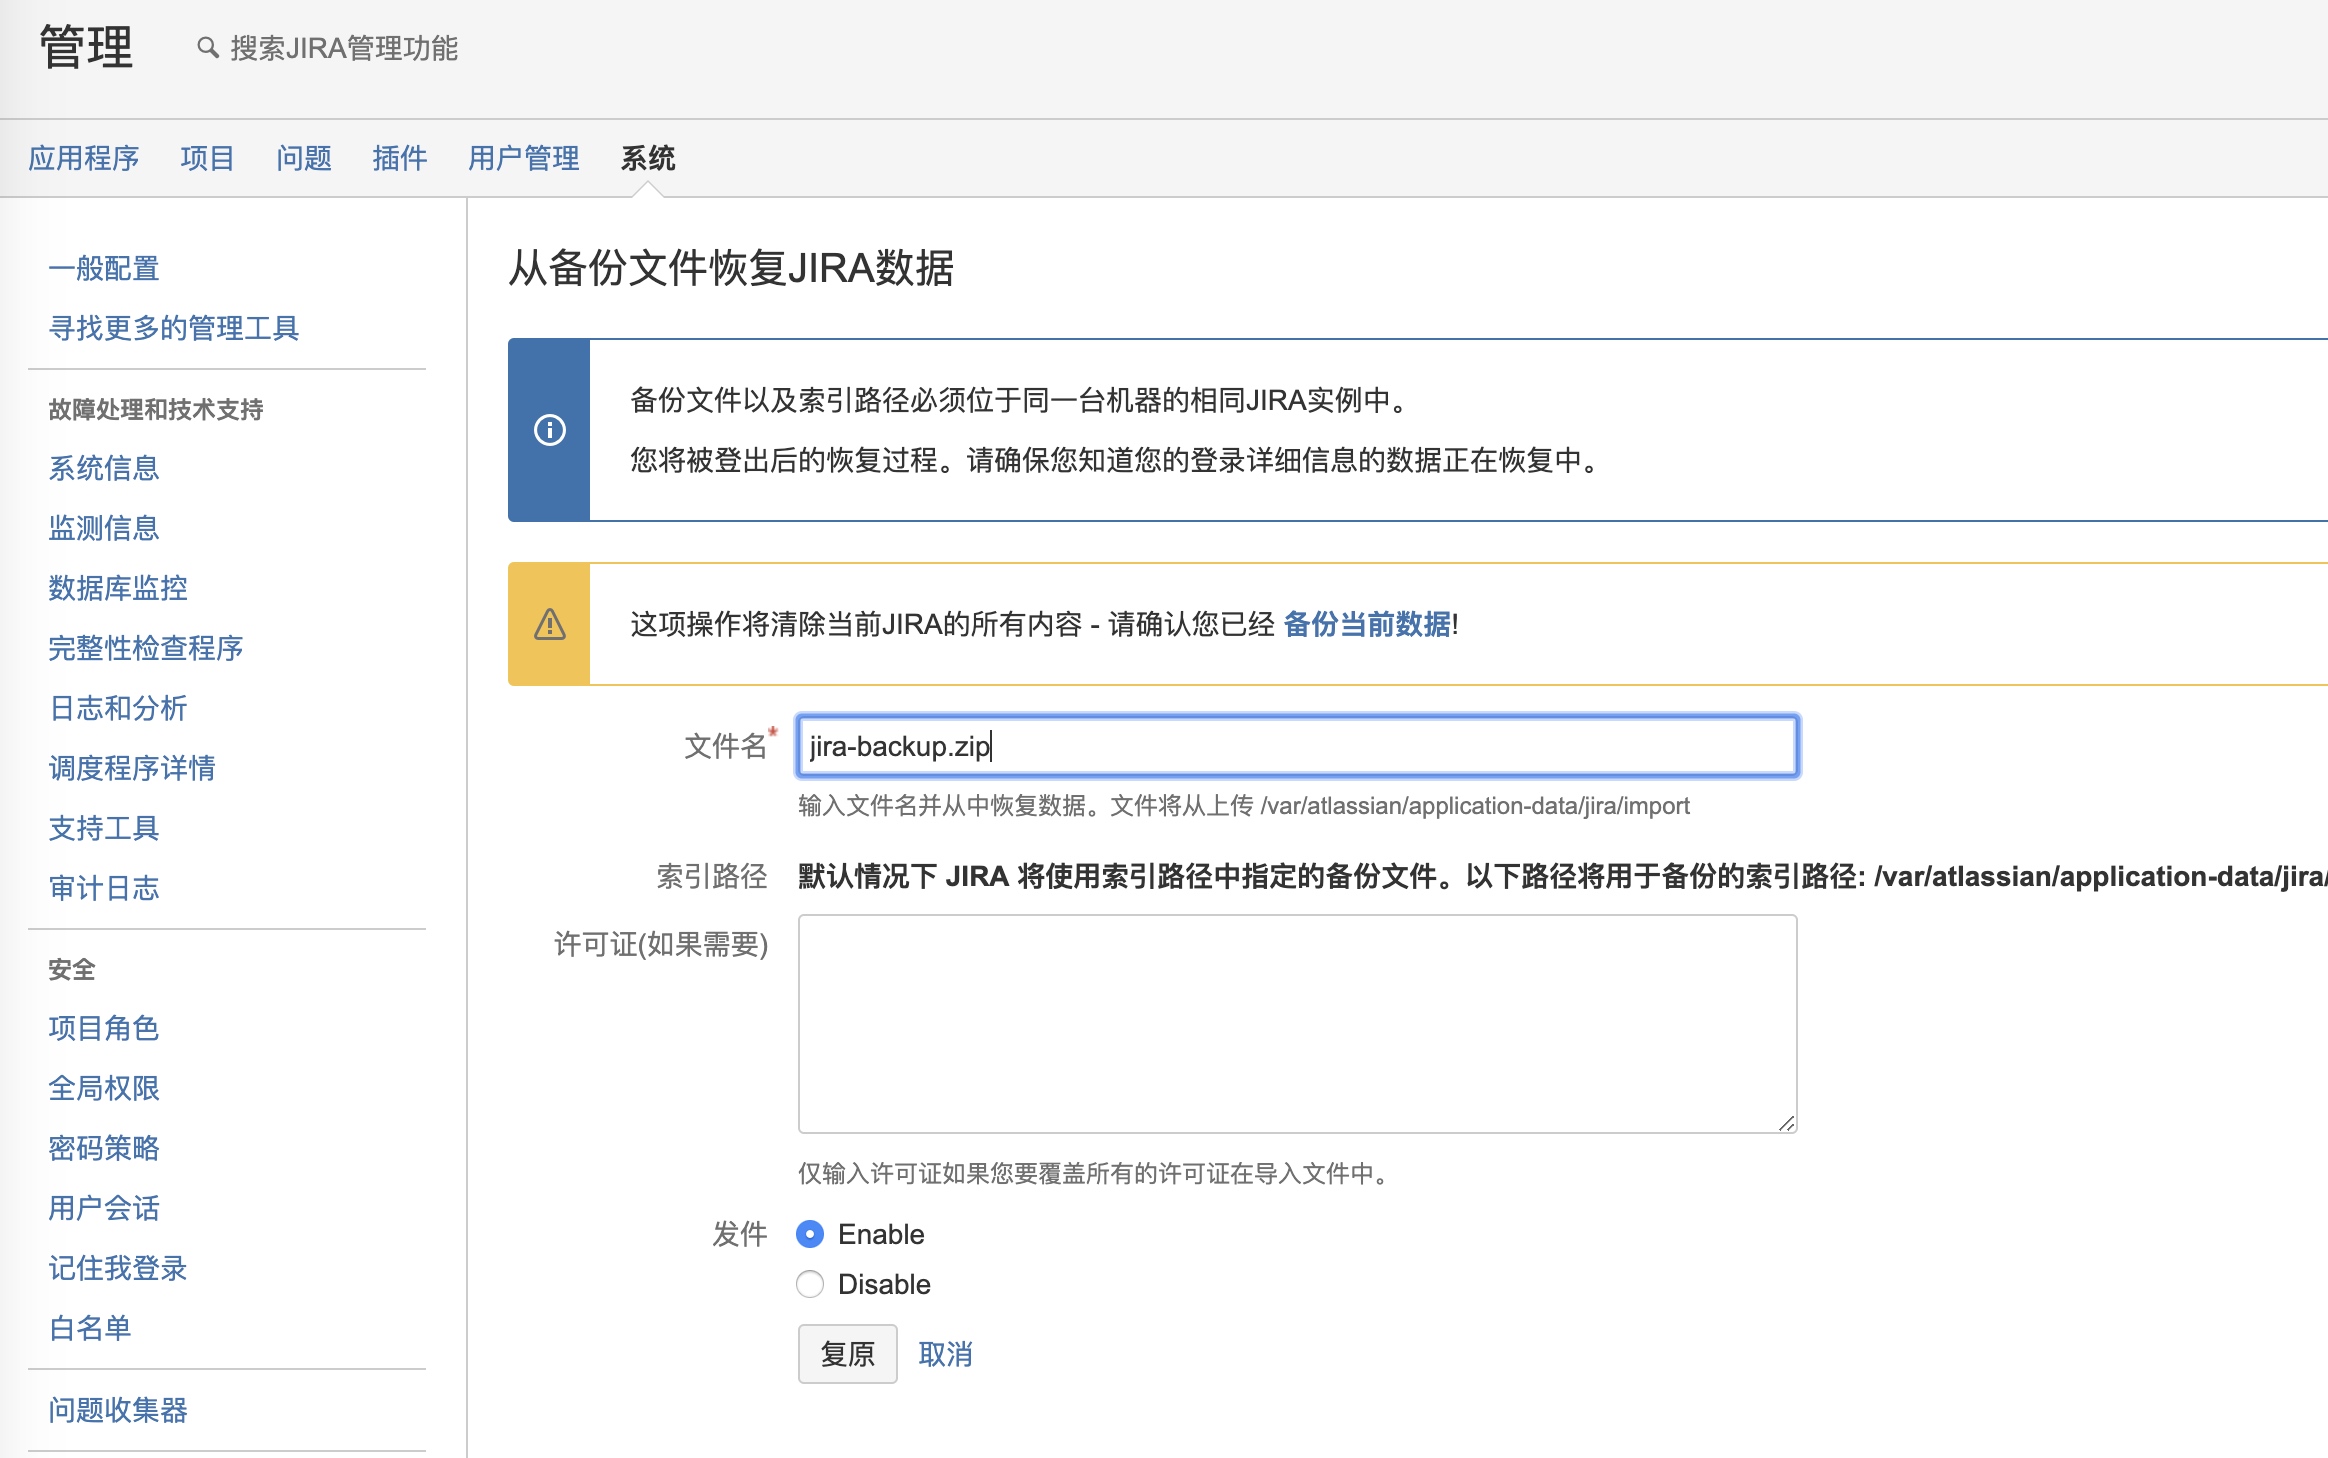
jira-backup.zipand the attachments archive to the new server.
On the destination server:
- Stop Jira.
- Extract the attachments archive to
/var/atlassian/application-data/jira/data/attachments. - Copy
jira-backup.zipto/var/atlassian/application-data/jira/import. - Start Jira and navigate to System > Import and Export > Restore System.
Confluence Installation
The original server ran Confluence 6.3.1, which had critical vulnerabilities in the WebDAV and Widget Connector components (the same vulnerabilities that led to the cryptomining attack). We upgraded to version 6.6.12, which includes security fixes.
Download the Installer
wget https://product-downloads.atlassian.com/software/confluence/downloads/atlassian-confluence-6.6.12-x64.bin
Create the Confluence Database
CREATE DATABASE confluence CHARACTER SET utf8 COLLATE utf8_bin;
GRANT ALL ON confluence.* TO 'confluence'@'localhost' IDENTIFIED BY 'confluencepassword';
FLUSH PRIVILEGES;
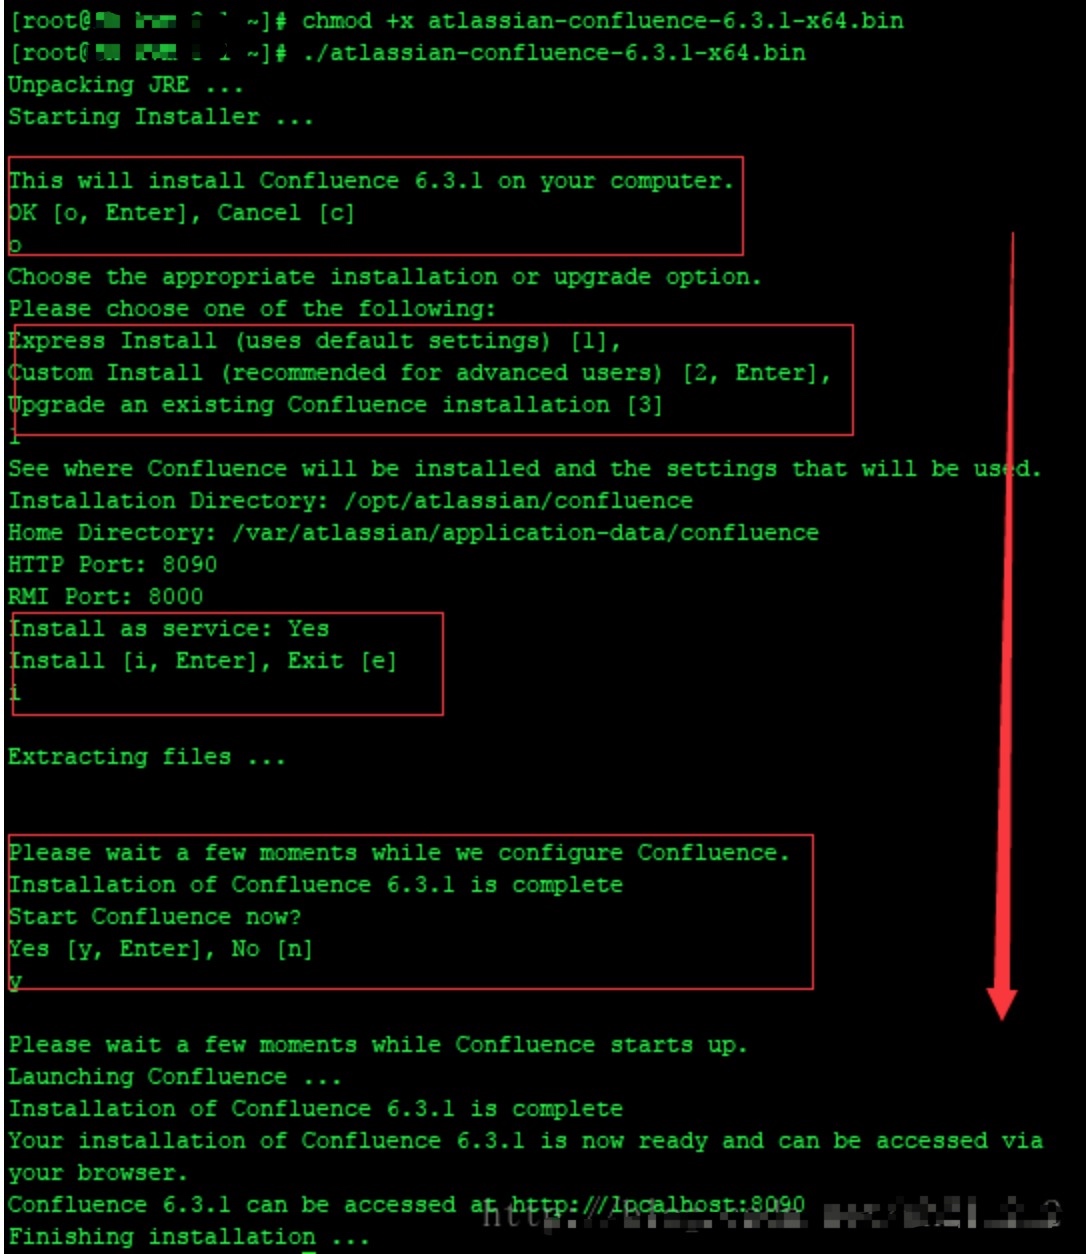
Run the Installer
chmod +x atlassian-confluence-6.6.12-x64.bin
./atlassian-confluence-6.6.12-x64.bin
Default paths:
- Application:
/opt/atlassian/confluence - Data:
/var/atlassian/application-data/confluence - Default port: 8090
Setup and License Activation
Important: During initial setup, always access Confluence via IP:port (e.g.,
http://10.0.0.5:8090), not a domain name. Using a domain name during the database configuration step consistently causes timeout errors.
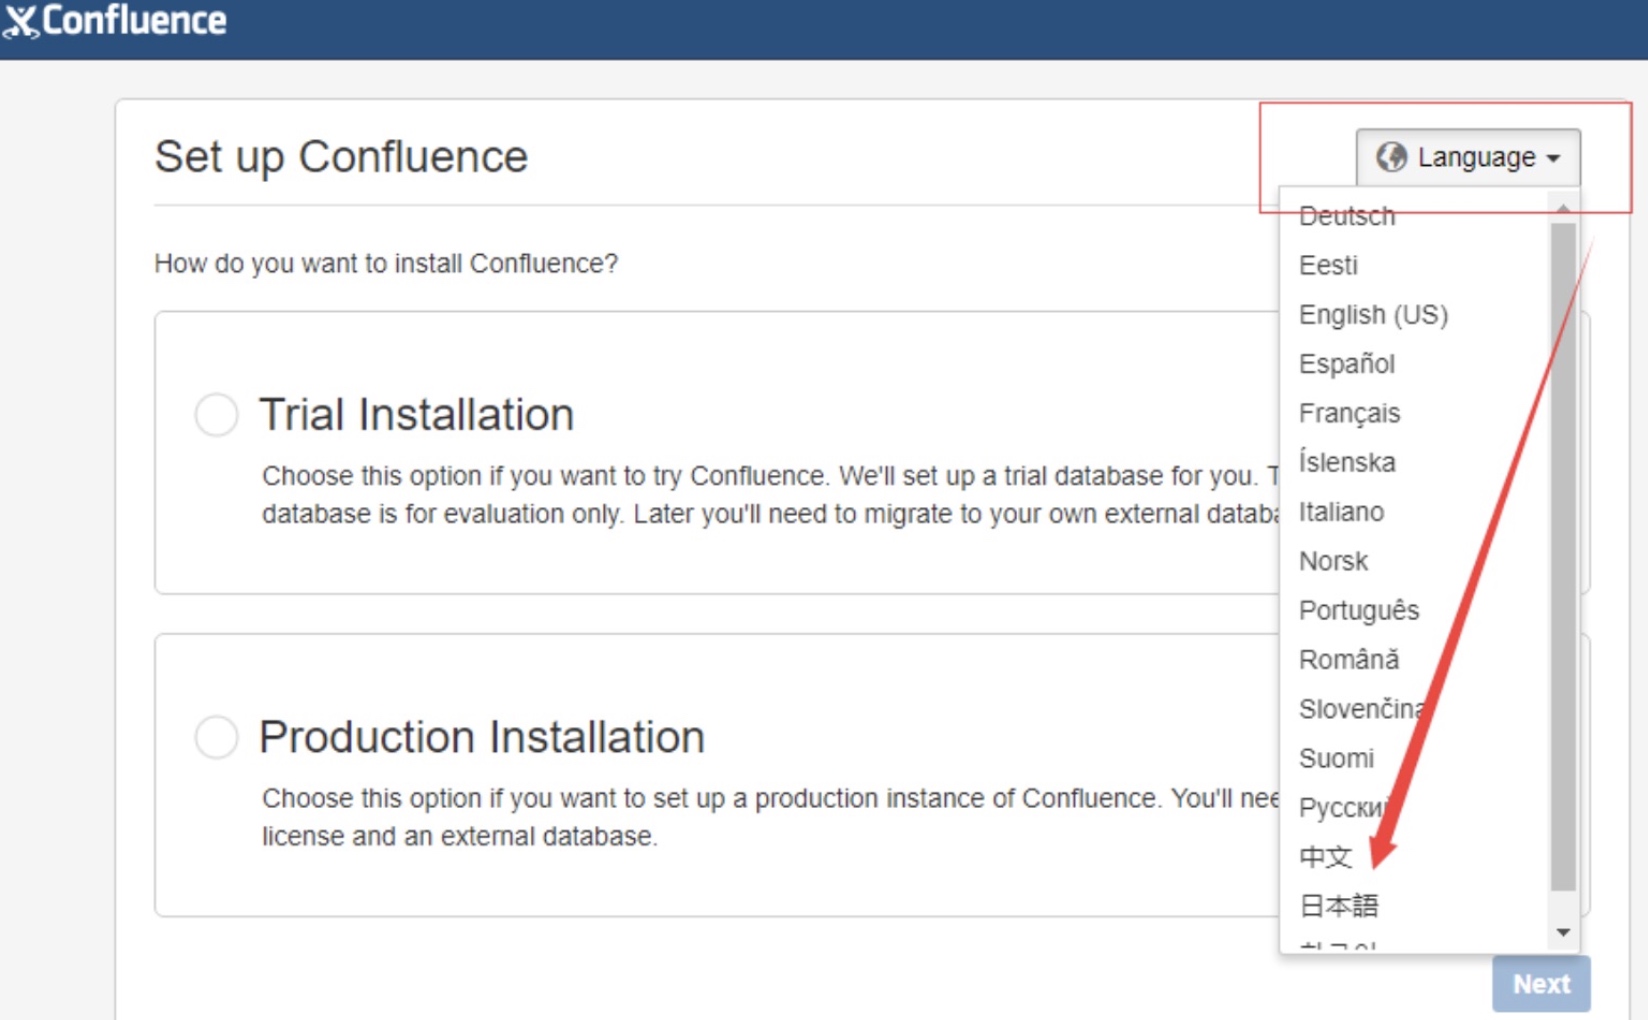
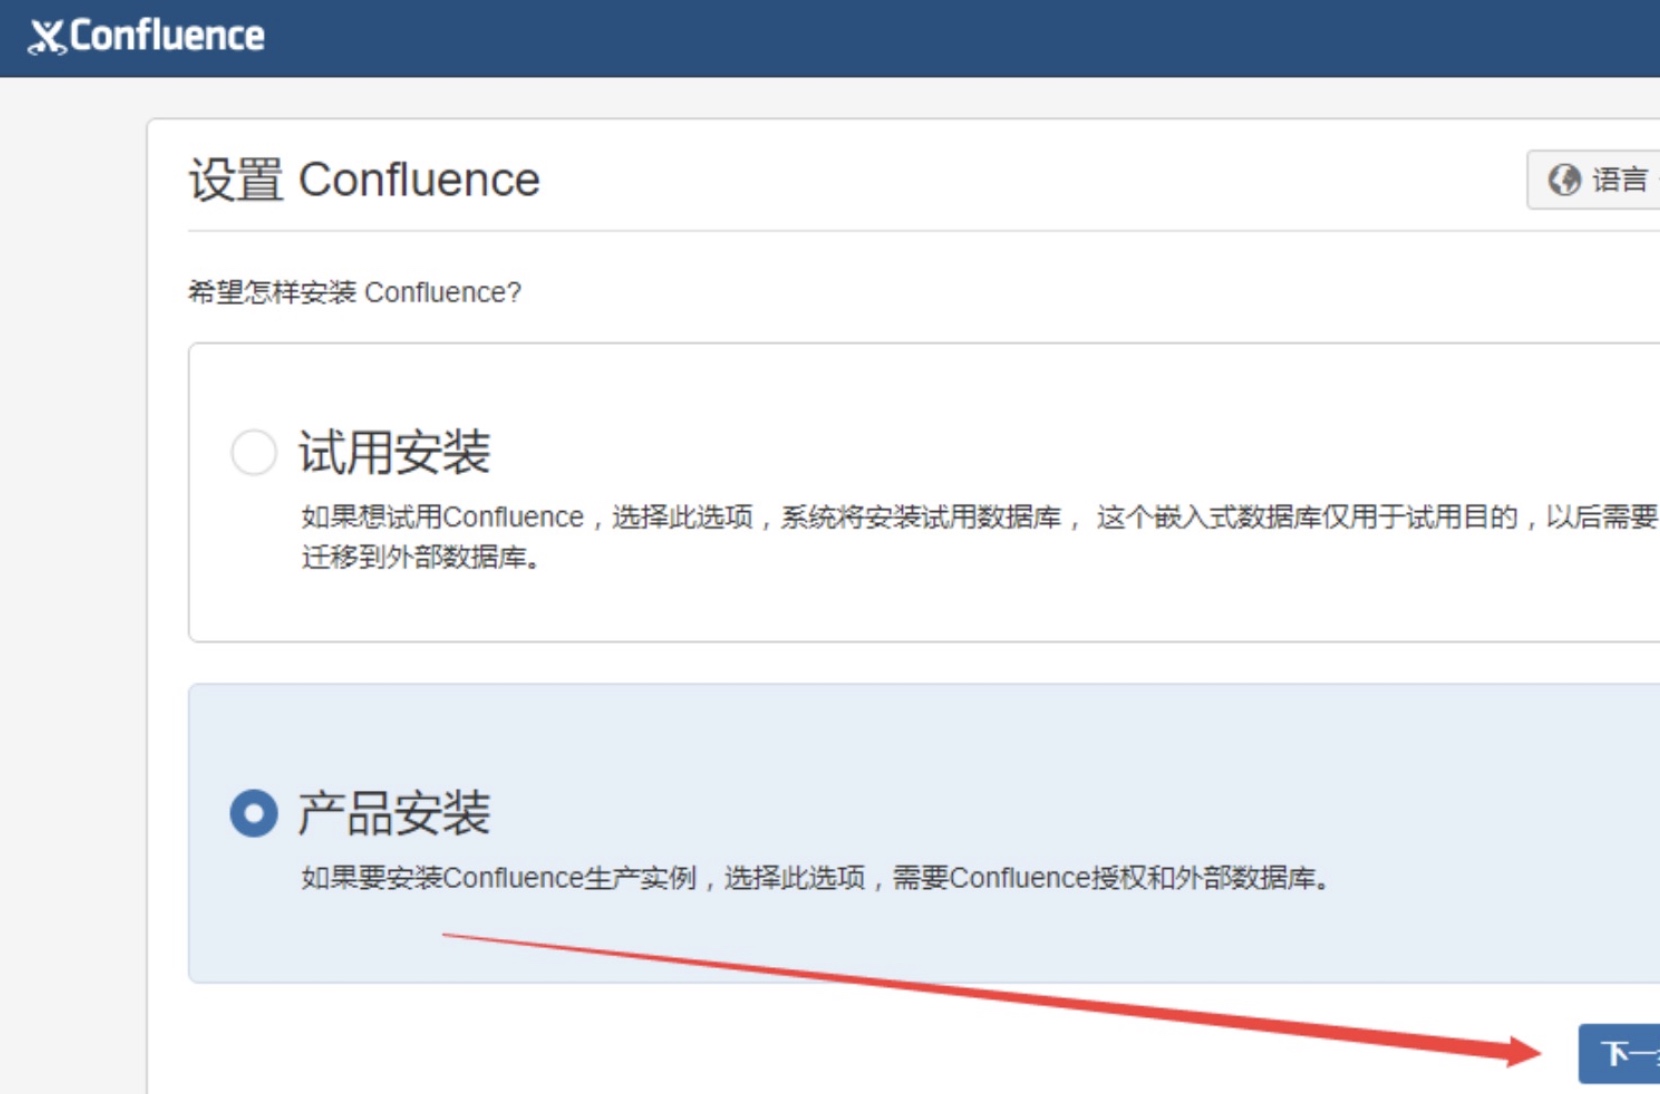
- Open
http://ip:8090and select your language. - Choose the product type and skip plugin installation.
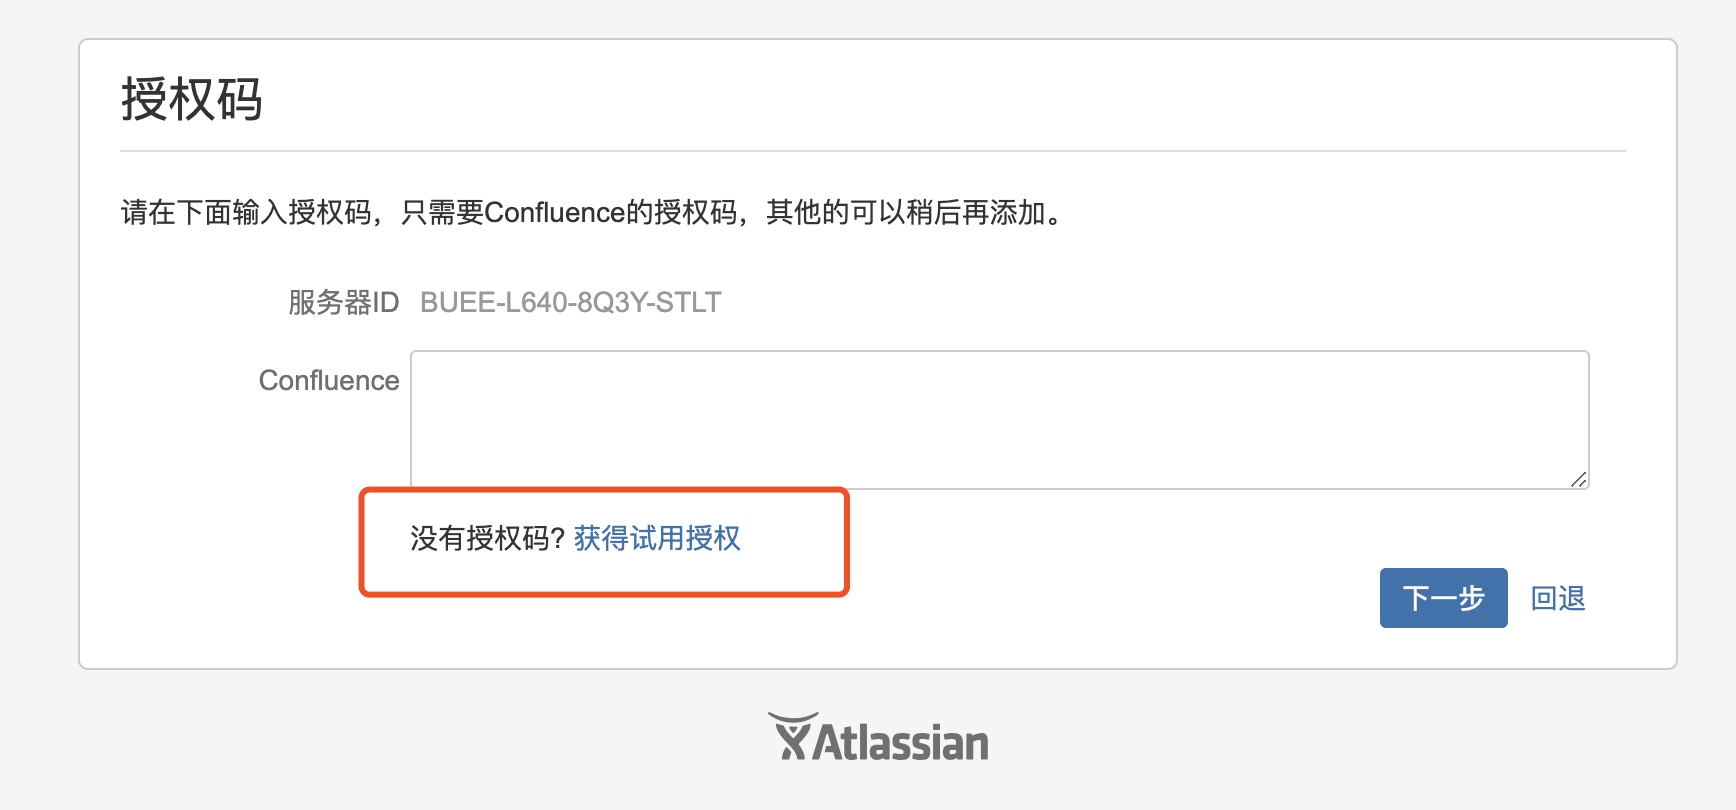
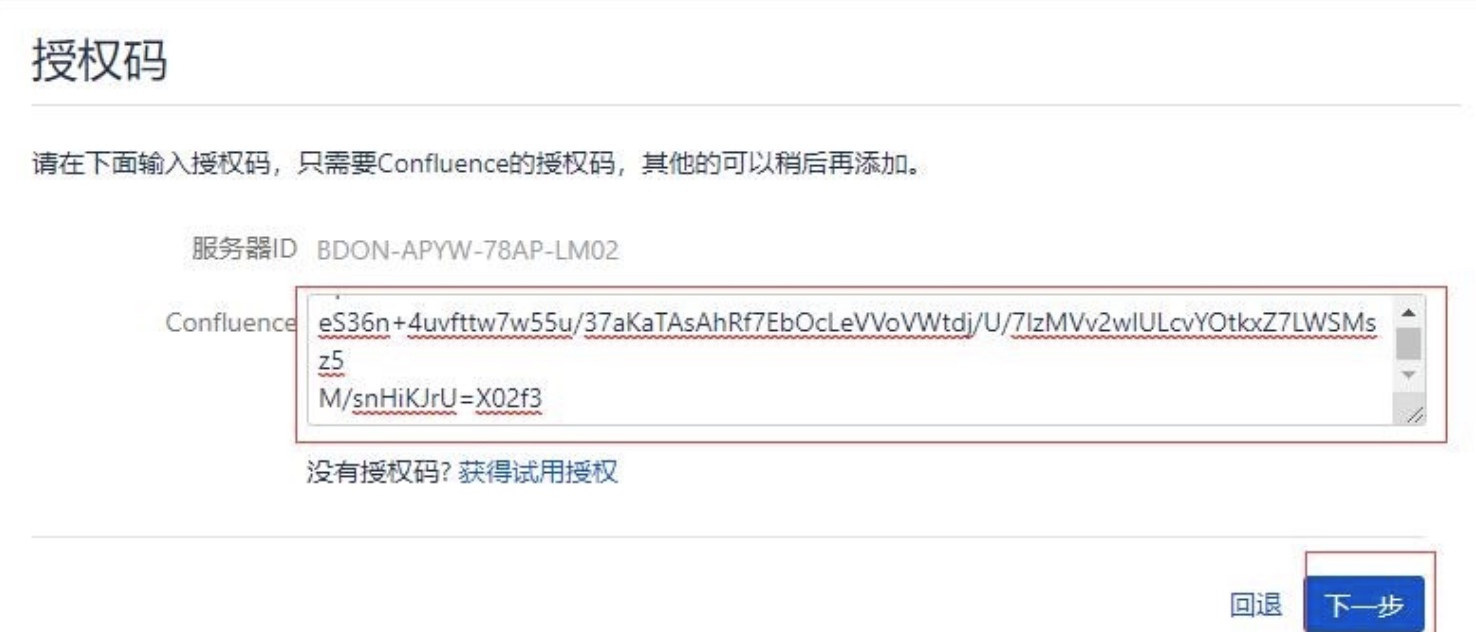
- Record the Server ID displayed on the license page — you will need it.
- Stop Confluence, copy the MySQL connector JAR to
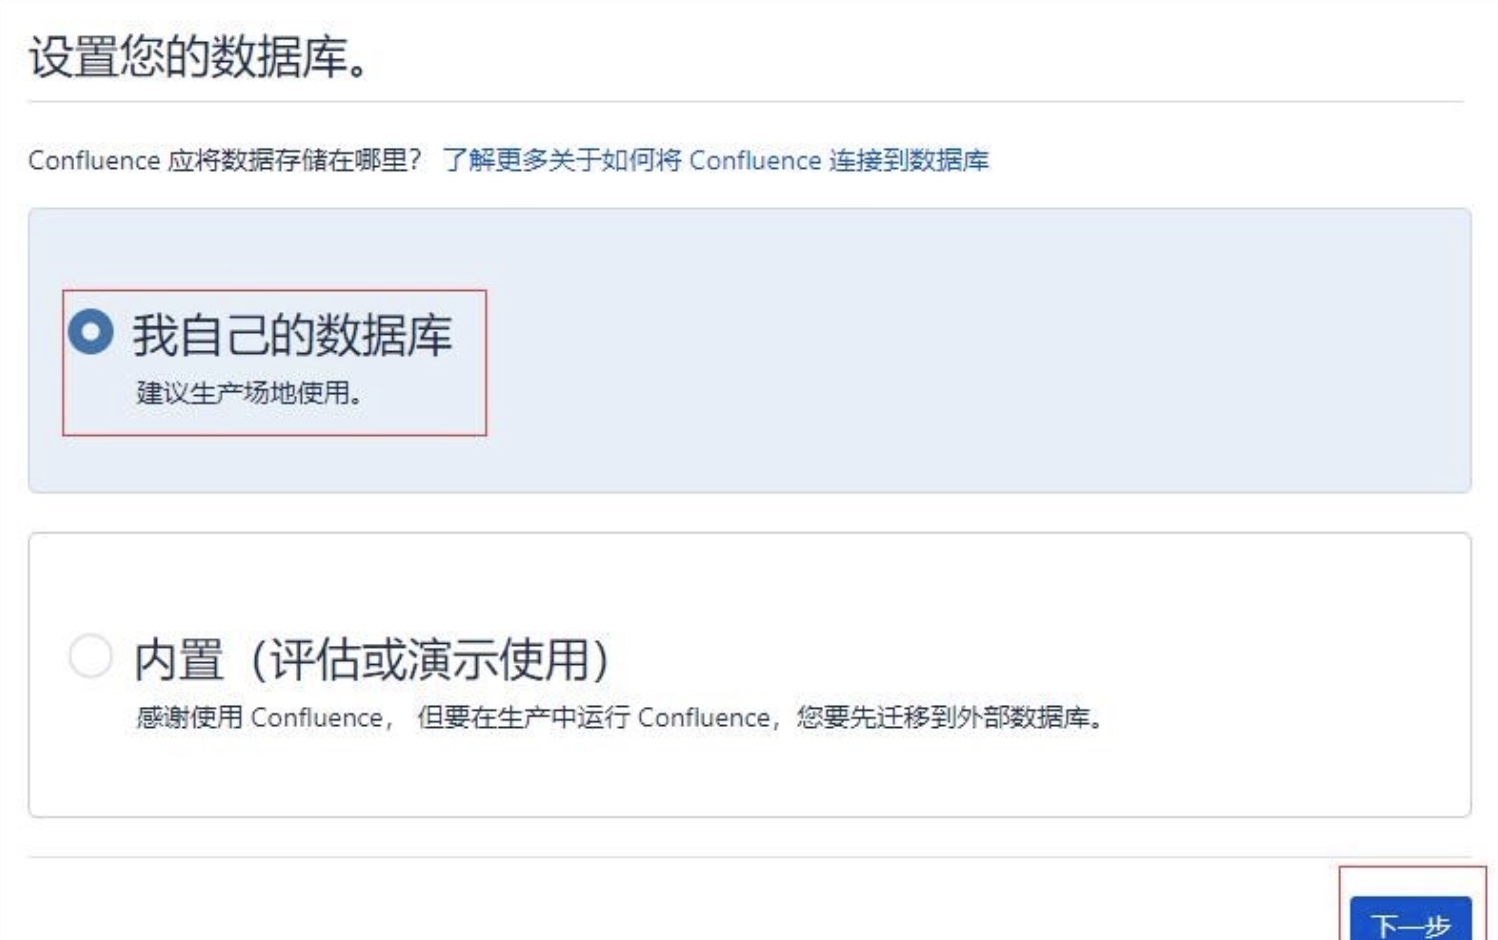
/opt/atlassian/confluence/lib/, and proceed with license activation. - Enter your license key and configure the database connection.
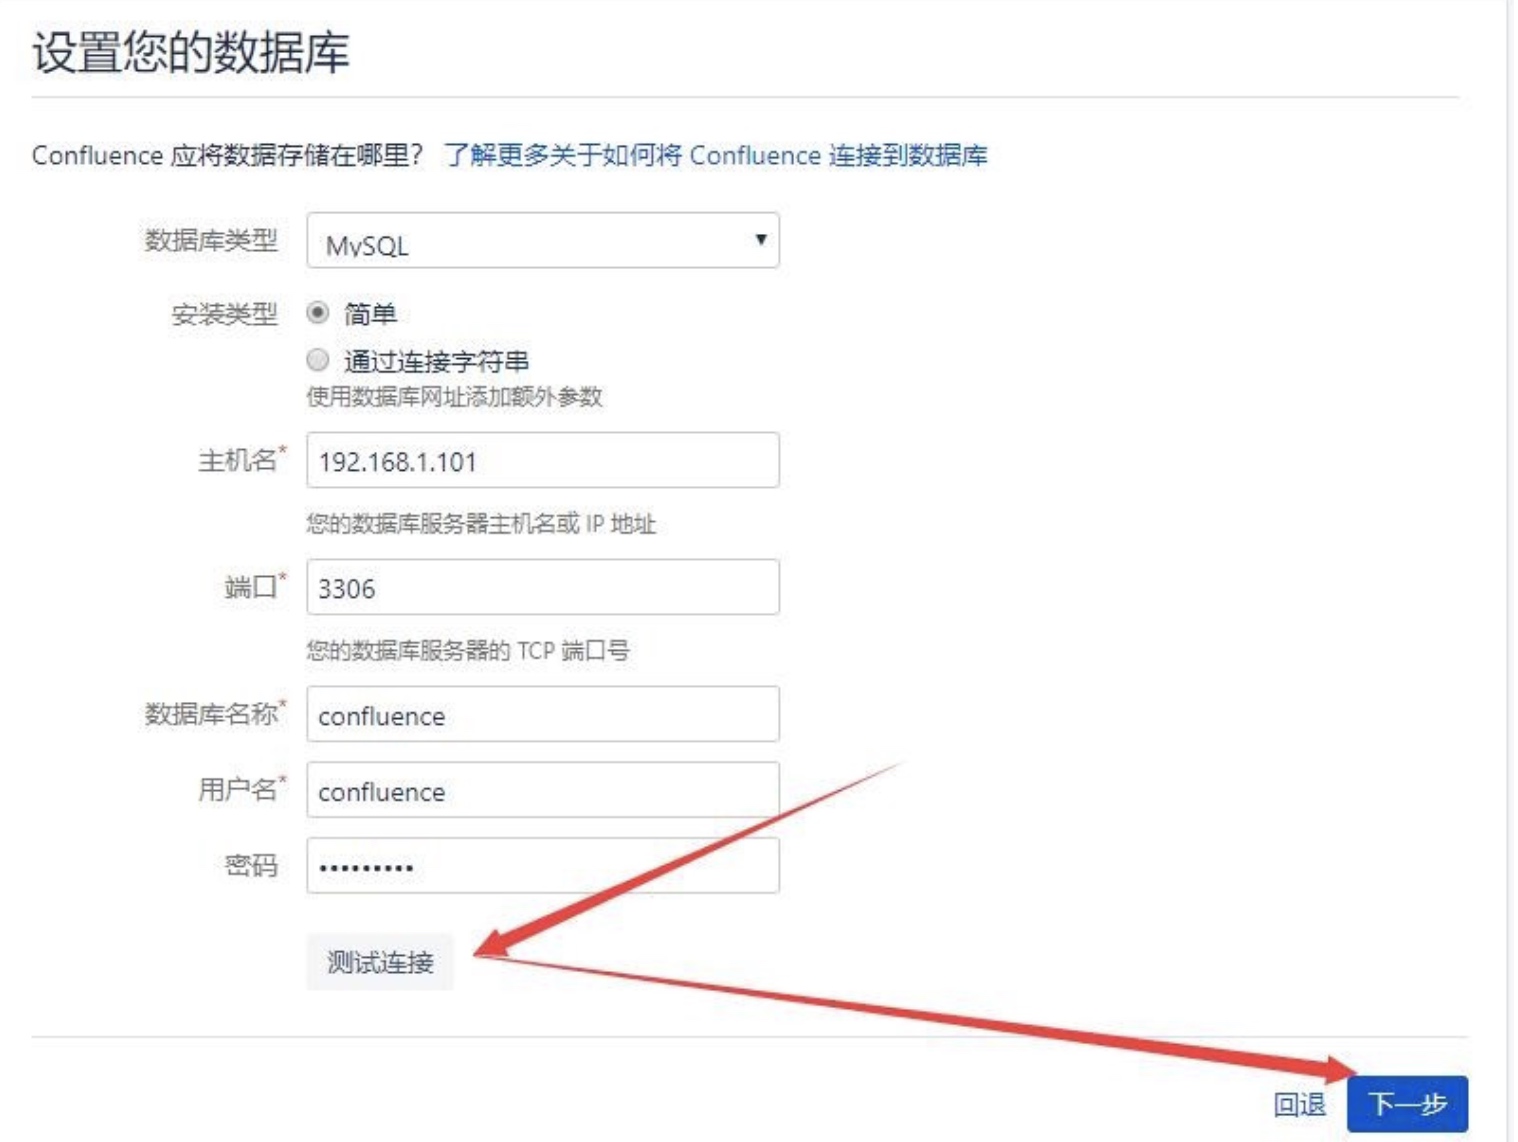
The database configuration step writes many tables and takes a while.
The database connection configuration is stored in /var/atlassian/application-data/confluence/confluence.cfg.xml.
- For user management, you can choose Confluence’s internal directory or link to Jira. It is strongly recommended to create an internal admin account first, then add Jira integration afterward.

Verify the license at http://ip:port/admin/license.action:

Data Migration
On the source server:
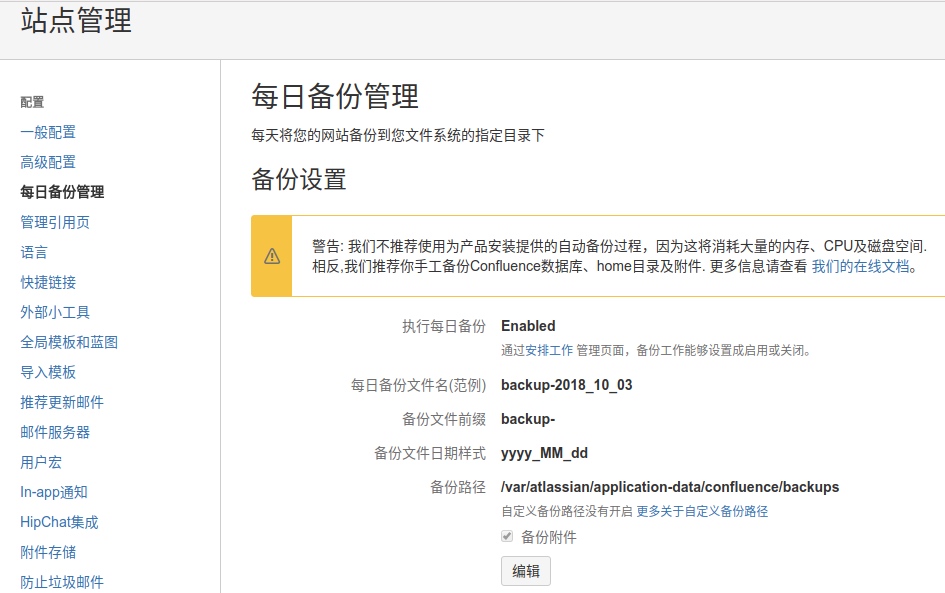
Confluence performs daily automatic backups to /var/atlassian/application-data/confluence/backups. You can also trigger a manual backup from General Configuration > Backup and Restore.
Note: Back up attachments separately from
/var/atlassian/application-data/confluence/attachments.
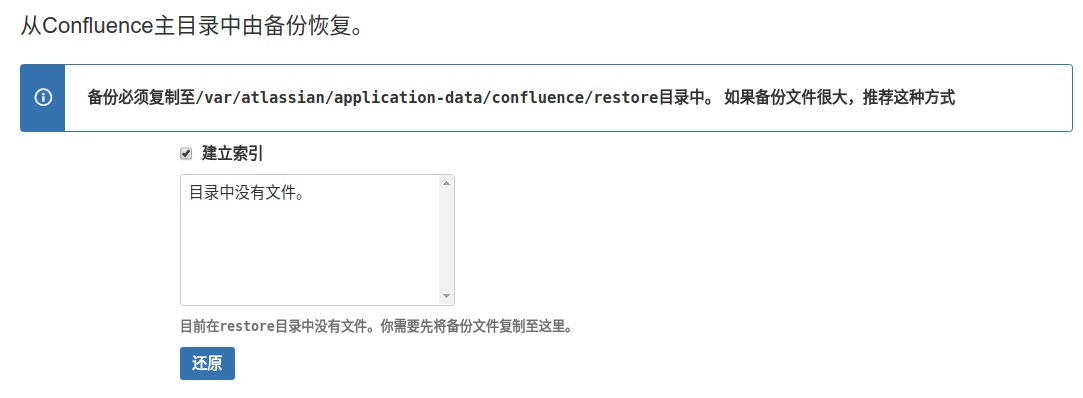
On the destination server:
- Stop Confluence.
- Extract attachments to
/var/atlassian/application-data/confluence/attachments. - Copy the backup ZIP to
/var/atlassian/application-data/confluence/restore. - Start Confluence and restore from General Configuration > Backup and Restore.
Troubleshooting
1. Critical Security Vulnerabilities
The Widget Connector component (version 3.1.3 and earlier) in Confluence Server contains a Server-Side Template Injection (SSTI) vulnerability. Attackers can exploit this for path traversal, SSRF, and remote code execution.
Fix: Upgrade to a patched version:
- 6.6.12+ (for 6.6.x)
- 6.12.3+ (for 6.12.x)
- 6.13.3+ (for 6.13.x)
- 6.14.2+
Reference: Confluence Security Advisory 2019-03-20
2. Database Character Encoding Issues
If you see errors like duplicate entry '???' for key xxx during data restore, your MySQL character set is likely wrong (defaulting to Latin).
Edit /etc/mysql/mysql.conf.d/mysqld.cnf and add under [mysqld]:
collation_server=utf8_unicode_ci
character_set_server=utf8
skip-character-set-client-handshake
transaction-isolation=READ-COMMITTED

key_buffer_size         = 32M
max_allowed_packet      = 128M
innodb_log_file_size    = 512M
Restart MySQL, then retry the import.
3. User Directory Integration
Confluence supports two user management approaches:
- Internal directory: Users are managed within Confluence only.
- External directory (Jira/LDAP): Users are synchronized from Jira via application links.
Critical tip: Always create an internal admin account during initial setup. Only internal admin users can modify external directory configurations at http://host:port/plugins/servlet/embedded-crowd/directories/list.
To connect Confluence to Jira’s user directory:
- In Jira, add a new application at
http://jira.example.com/secure/admin/ConfigureCrowdServer.jspa. Specify an application name, password, and the Confluence server IP. - In Confluence, add a user directory at the directory management page. Select Jira as the type and enter the Jira server URL, application name, and password from step 1.
4. Locked Out After Data Restore
After restoring backup data, the new internal admin account may be deleted and external directory settings reverted to the old configuration, leaving you unable to log in.
Fix: Create an admin user directly in the database:
-- Create user 'confluence-admin' with password 'admin'
INSERT INTO cwd_user(id, user_name, lower_user_name, active, created_date,
  updated_date, first_name, lower_first_name, last_name, lower_last_name,
  display_name, lower_display_name, email_address, lower_email_address,
  directory_id, credential)
VALUES (1212121, 'confluence-admin', 'confluence-admin', 'T',
  '2009-11-26 17:42:08', '2009-11-26 17:42:08', 'Admin', 'admin',
  'User', 'user', 'Admin User', 'admin user',
  '[email protected]', '[email protected]',
  (SELECT id FROM cwd_directory WHERE directory_name='Confluence Internal Directory'),
  'x61Ey612Kl2gpFL56FT9weDnpSo4AV8j8+qx2AuTHdRyY036xxzTTrw10Wq3+4qQyB+XURPWx1ONxp3Y3pB37A==');

-- Add user mapping
INSERT INTO user_mapping VALUES ('2c9681954172cf560000000000000001',
  'confluence-admin', 'confluence-admin');

-- Add to admin and users groups
INSERT INTO cwd_membership (id, parent_id, child_user_id)
VALUES (163841,
  (SELECT id FROM cwd_group WHERE group_name='confluence-users'
   AND directory_id=(SELECT id FROM cwd_directory
   WHERE directory_name='Confluence Internal Directory')),
  1212121);

INSERT INTO cwd_membership (id, parent_id, child_user_id)
VALUES (163842,
  (SELECT id FROM cwd_group WHERE group_name='confluence-administrators'
   AND directory_id=(SELECT id FROM cwd_directory
   WHERE directory_name='Confluence Internal Directory')),
  1212121);
Once logged in with this account, reconfigure the external user directory settings.
Reference: Restore Passwords to Recover Admin Rights
Comments
Join the discussion — requires a GitHub account